21 x 14 inFinished stocking (height x heel to toe)
8-10 hrsTime needed
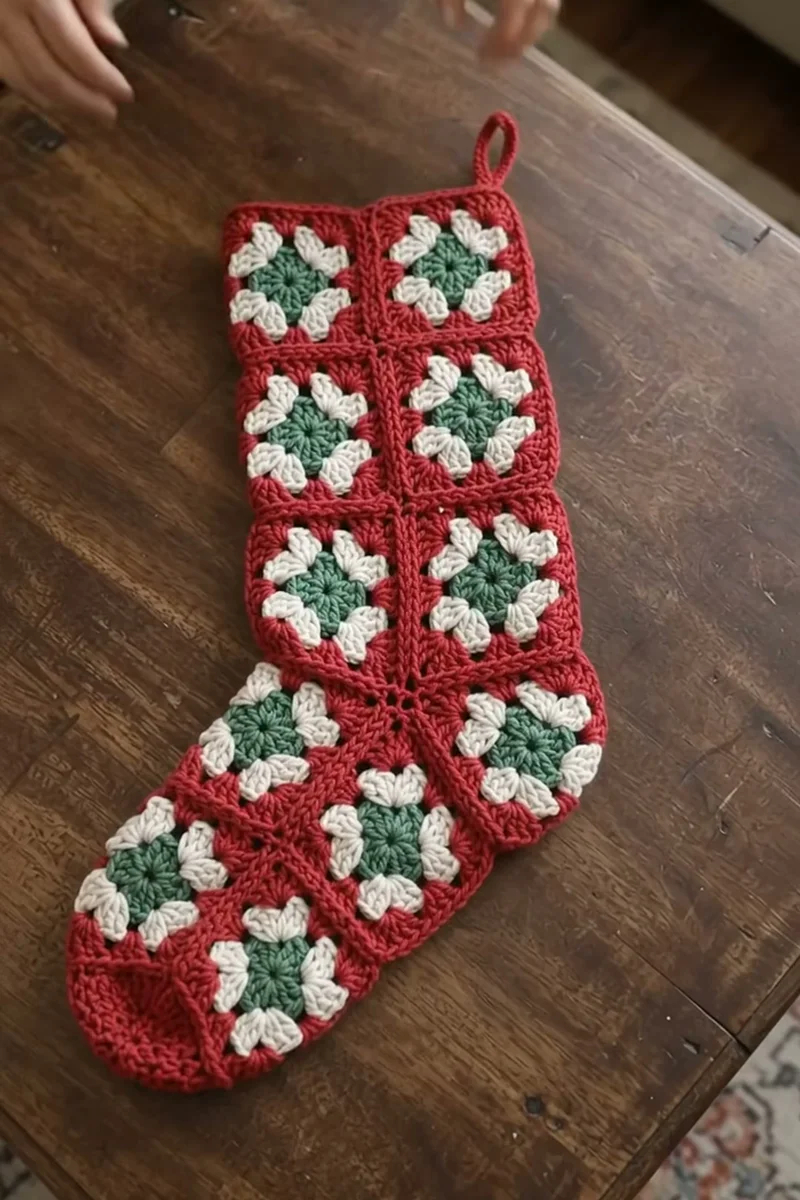
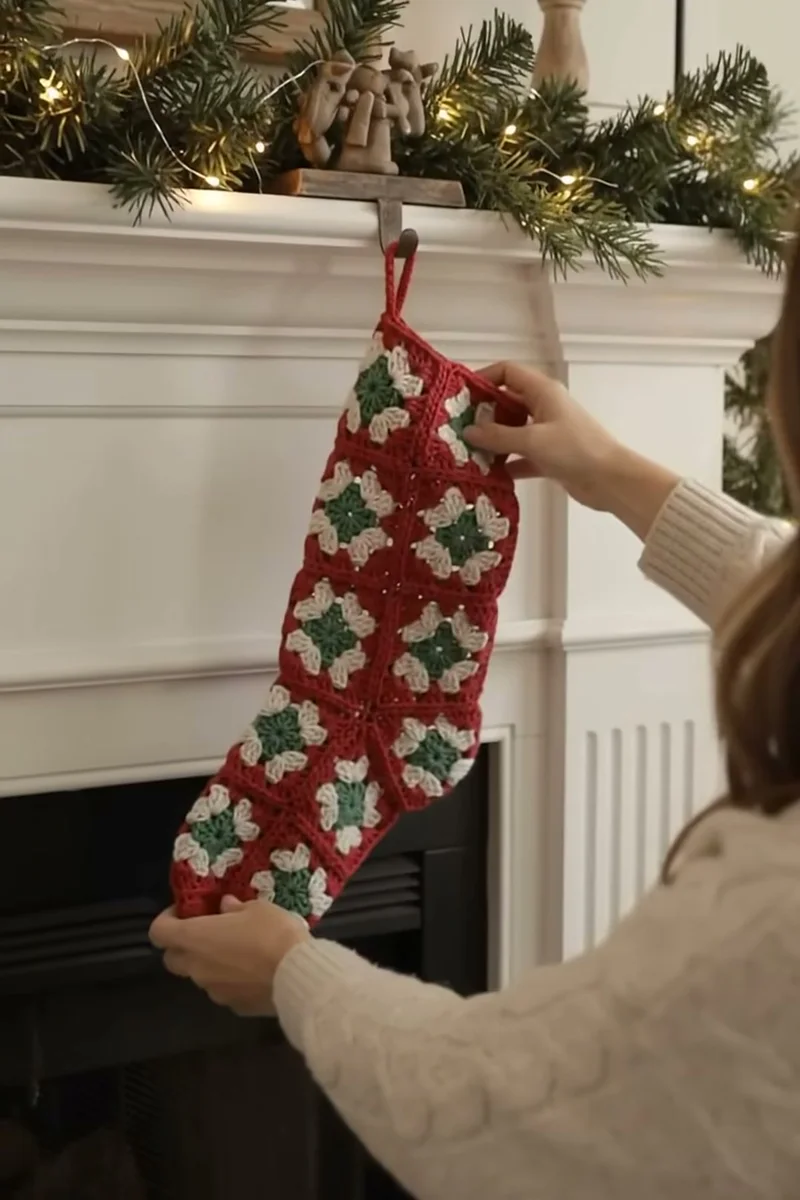
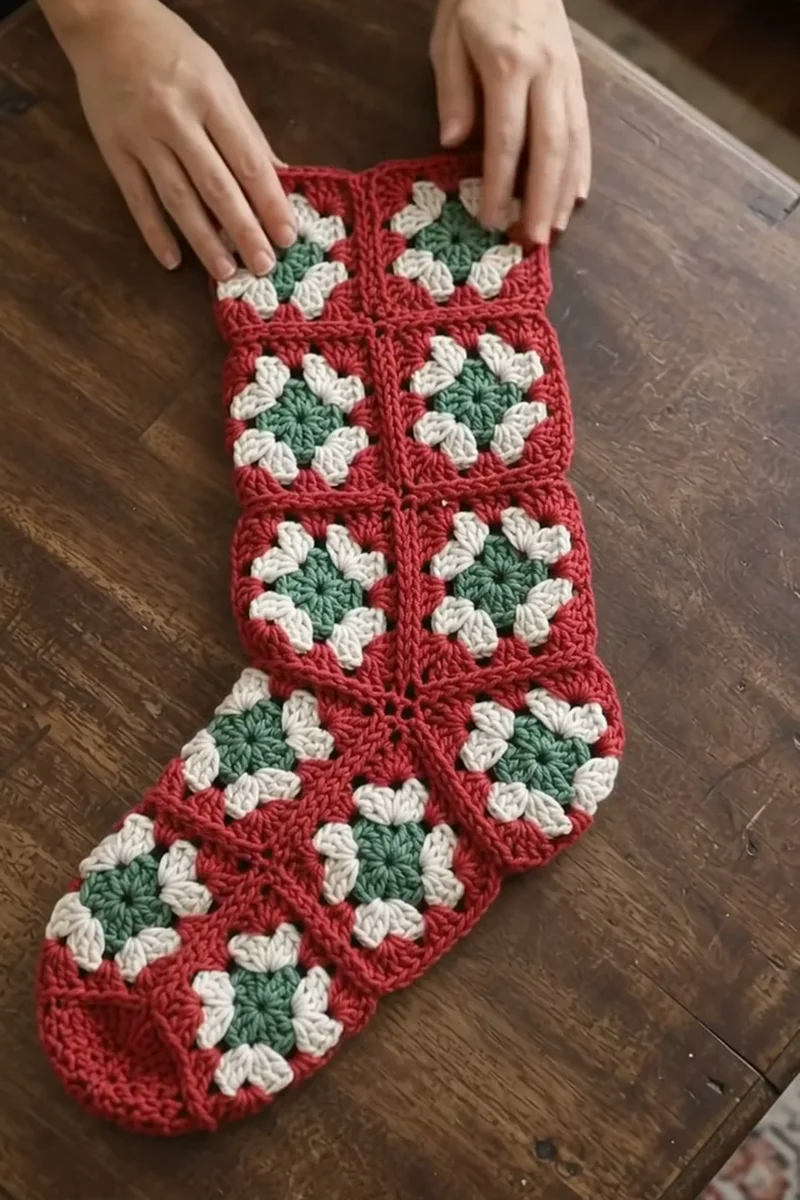
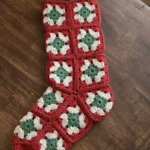
This crochet granny square Christmas stocking is made from 24 classic squares in red, cream and pine green. Each square has a green center, a cream round of clusters and two red rounds, and the squares are joined with raised red seams so the whole stocking looks like a vintage granny blanket.
You make 12 squares for each side and join them into a leg two squares wide and four tall, with the foot turning toward the toe. A small red triangle fills the ankle, and solid red caps round off the heel and toe. The two panels are edged, joined together, and finished with a cuff and a hanging loop.
Plan on 8 to 10 hours. The squares are easy and repeat, so you can make them a few at a time. The joining and shaping take more care, but every step is written out. The finished stocking is about 21 in tall and 14 in from heel to toe.
🧶 Materials
Yarn (worsted weight / #4, acrylic or cotton blend)
Red (Color C): about 450 yds / 410 m for squares, seams, heel, toe, edging, cuff and loop
Cream (Color B): about 130 yds / 120 m
Pine green (Color A): about 90 yds / 82 m
Hooks
US H-8 (5 mm) crochet hook, or the size needed to get gauge
Optional: US I-9 (5.5 mm) hook for the joining seams if you crochet tightly
Notions
Tapestry needle for weaving in ends
Stitch markers (4 or 5)
Scissors
Optional: blocking mats and pins
Gauge
One finished granny square (Rounds 1-4) = 4 in x 4 in (10 cm x 10 cm)
16 sc and 18 rows = 4 in in single crochet (for the ankle triangle)
✂️ Abbreviations
ch: chain
sl st: slip stitch
sc: single crochet
hdc: half double crochet
dc: double crochet
sc2tog: single crochet 2 stitches together (decrease)
hdc2tog: half double crochet 2 stitches together (decrease)
sp: space
st(s): stitch(es)
RS / WS: right side / wrong side
rep: repeat
MR: magic ring (adjustable ring)
Before you start: Make one granny square before buying all your yarn. With worsted yarn and the 5 mm (H-8) hook it should measure 4 x 4 in (10 x 10 cm) after Round 4. If yours is bigger, go down a hook size; if it is smaller, go up one. For the ankle triangle, the gauge is 16 sc and 18 rows to 4 in.
Crochet Granny Square Christmas Stocking Pattern
This crochet granny square Christmas stocking uses 24 red, cream and green squares, raised red seams, a solid heel and toe, a cuff and a hanging loop.
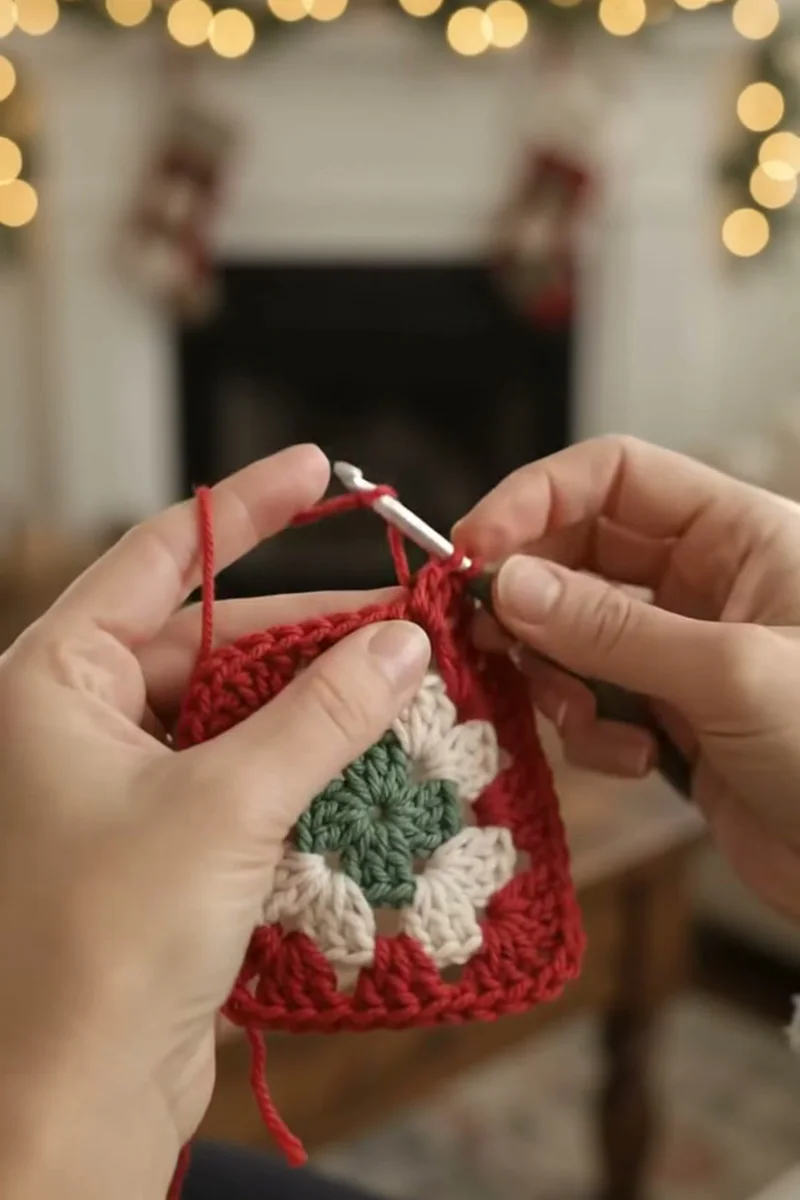
Round 1 (green) :With Color A, make a MR. Ch 3 (counts as first dc), 2 dc in ring, ch 2, *3 dc in ring, ch 2; rep from * 2 more times. Pull the ring closed and sl st to the top of the beginning ch-3. Fasten off. (12 dc, 4 ch-2 corner sps)
Round 2 (cream) :Join Color B in any ch-2 corner sp. Ch 3, (2 dc, ch 2, 3 dc) in the same sp, ch 1, *(3 dc, ch 2, 3 dc) in the next corner sp, ch 1; rep from * 2 more times. Sl st to the top of the beginning ch-3. Fasten off. (24 dc, 4 ch-2 corner sps, 4 ch-1 sps)
Round 3 (red) :Join Color C in any ch-2 corner sp. Ch 3, (2 dc, ch 2, 3 dc) in the same sp, ch 1, 3 dc in the next ch-1 sp, ch 1, *(3 dc, ch 2, 3 dc) in the next corner sp, ch 1, 3 dc in the next ch-1 sp, ch 1; rep from * 2 more times. Sl st to the top of the beginning ch-3. Do not fasten off. (36 dc, 4 ch-2 corner sps, 8 ch-1 sps)
Round 4 (red) :Sl st in the next 2 dc and into the corner sp. Ch 3, (2 dc, ch 2, 3 dc) in the same sp, [ch 1, 3 dc in the next ch-1 sp] twice, ch 1, *(3 dc, ch 2, 3 dc) in the next corner sp, [ch 1, 3 dc in the next ch-1 sp] twice, ch 1; rep from * 2 more times. Sl st to the top of the beginning ch-3. Fasten off, leaving a 6 in tail. Each side now has 12 dc and 3 ch-1 sps between the corners. (48 dc, 4 ch-2 corner sps, 12 ch-1 sps)
Check :Your square should measure 4 in (10 cm) from side to side. Weave in the green and cream ends now so they do not get trapped in the seams. Make 24 squares total: 12 for the front and 12 for the back.
Working the first part, one row at a time.
Part 2: Panel Layout :
Front panel map (RS up, toe pointing left) :Row 1: [empty] [B1] [C1]. Row 2: [empty] [B2] [C2]. Row 3: [ankle triangle] [B3] [C3]. Row 4: [A4] [B4] [C4]. Row 5: [A5] [B5] [C5]. Columns B and C rows 1-4 form the leg (2 squares wide x 4 tall). Row 5 and column A form the foot. The top of the stocking is Row 1, the toe is the left edge of A4/A5, and the heel is the right edge of C5. (12 squares)
Seam method :Hold two squares with WS together and RS facing you. With Color C, join with a sc through both corner ch-2 sps. Working through both layers, sc in each dc and each ch-1 sp across (15 sc), then sc through both corner sps at the end. That is 17 sc per square edge, and it leaves a raised red ridge on the RS.
Horizontal seams :Join the squares of each row first: B1 to C1, B2 to C2, B3 to C3, then A4 to B4 to C4, and A5 to B5 to C5. When a seam crosses two pairs of squares, keep going without fastening off: 17 sc for the first pair, then 17 sc for the next pair. (17 sc per pair)
Vertical seams :Now join the rows to each other in the same way: Row 1 to Row 2, Row 2 to Row 3, Row 3 to Row 4 (columns B and C only, 34 sc), and Row 4 to Row 5 (columns A, B and C, 51 sc). At each spot where four corners meet, work 1 sc through the joined corner sps so the ridge stays continuous.
Part 4: Ankle Triangle (make 2) :
Foundation :With Color C, ch 17.
Row 1 :Sc in the 2nd ch from the hook and in each ch across. (16 sc)
Row 2 :Ch 1, turn. Sc2tog, sc in each st to the end. (15 sc)
Row 3 :Ch 1, turn. Sc in each st to the last 2 sts, sc2tog. (14 sc)
Rows 4-16 :Repeat Rows 2 and 3, always decreasing on the same slanted edge, until 1 st remains. Fasten off, leaving a 20 in tail for sewing. (1 sc)
Attach :The two straight edges of the triangle form a right angle. Place that corner into the inner corner where the top of A4 meets the left side of B3. Sew or sc the bottom edge to the top of A4 and the upright edge to the left side of B3. The slanted edge now runs from the top left corner of A4 up to the top left corner of B3, giving the front of the ankle its slope. Make the second triangle as a mirror for the back panel by flipping it over before attaching.
Part 5: Toe and Heel Caps :
Toe cap, Row 1 :With RS facing, join Color C at the top left corner of A4. Work hdc down the left edge of A4 and A5: 17 hdc along each square edge. (34 hdc)
Toe cap, Row 2 :Ch 1, turn. Hdc2tog, hdc in each st to the last 2 sts, hdc2tog. (32 hdc)
Toe cap, Rows 3-5 :Repeat Row 2 three more times. Fasten off. (26 hdc)
Heel cap, Row 1 :With RS facing, join Color C at the bottom right corner of C5. Work hdc up the right edge of C5. (17 hdc)
Heel cap, Rows 2-3 :Ch 1, turn. Hdc2tog, hdc in each st to the last 2 sts, hdc2tog. Repeat once more. Fasten off. (13 hdc)
Back panel :Work the toe cap and heel cap on the back panel in the same way, starting each Row 1 at the matching corner so the caps mirror the front.
Part 6: Edging, Joining the Panels and Cuff :
Panel edging :With RS facing, join Color C anywhere along the side of the leg. Sc evenly around the whole panel: 1 sc in each st and sp, 1 sc at the end of each hdc or sc row on the caps and triangle, and 3 sc in each outer corner. Sc2tog at the inner corner where the ankle triangle meets B3. Sl st to the first sc and fasten off. Count your stitches and make sure the back panel has the same number.
Join front to back :Hold the panels with WS together, front panel facing you, edges matched. Join Color C at the top corner on the toe side. Working through both layers, sc around the side, toe, sole, heel and back of the leg, working 3 sc in each outer corner of the heel and toe to keep them rounded. Leave the top open. Do not fasten off.
Cuff Round 1 :Ch 1. Working in the open top edge of both panels, sc evenly around, about 36 sc per panel. Sl st to the first sc. (72 sc)
Cuff Rounds 2-4 :Ch 2 (does not count as a st), hdc in each st around. Sl st to the first hdc. (72 hdc)
Cuff Round 5 :Ch 1, sc in each st around. Sl st to the first sc. Do not fasten off. (72 sc)
Part 7: Hanging Loop :
Position :Sl st along the cuff until you reach the side seam on the heel side (the back of the leg).
Chain :Ch 16, then sl st into the same st at the base of the chain to make a loop.
Cover the loop :Work 22 sc into the ch-16 loop, sl st into the cuff where you started. Fasten off and weave the tail back through the loop stitches. (22 sc)
Assembly :
Step 1 :Weave in the green and cream ends on each square before joining, so only red tails are left to hide later.
Step 2 :Lightly block all 24 squares to exactly 4 in so the seams line up.
Step 3 :Lay out the front panel with RS up following the map, then the back panel as a mirror image.
Step 4 :Join each panel with the RS single crochet seam: horizontal seams first, then vertical seams.
Step 5 :Attach the ankle triangle into the notch at A3 on each panel, mirrored for the back.
Step 6 :Work the toe cap on the left edge of A4/A5 and the heel cap on the right edge of C5 (mirror on the back panel).
Step 7 :Edge each panel with one round of red sc, then match stitch counts between front and back.
Step 8 :Place the panels WS together and sc them together around the sides and foot, leaving the top open.
Step 9 :Work the 5-round cuff around the top opening and finish with the hanging loop on the heel-side seam.
Step 10 :Weave in every remaining end along the seams and steam block the finished stocking flat.
Finishing :
Weave in every remaining end along the seams, where the extra yarn hides easily. Lay the stocking flat, mist it lightly and pat the squares into shape so the seams run straight and the heel and toe curves are smooth. Let it dry flat before hanging.
If the stocking will hold heavy gifts, hand-sew a felt or cotton lining inside so it does not stretch out of shape.
Tips for Success :
Tip :💡 The beginning ch-3 counts as a dc in every round of the granny square.
Tip :💡 Rounds 3 and 4 are both red, so you only join red once per square.
Tip :💡 The finished stocking measures about 21 in (53 cm) from the top of the cuff to the bottom of the sole, and about 14 in (36 cm) from heel to toe.
Tip :💡 Acrylic is the easiest to wash and holds a slightly fuller stocking well. A cotton blend gives crisper stitch definition and blocks very flat.
Tip :💡 If your stocking will hold heavy gifts, you can line it with felt or a cotton fabric hand-sewn inside the cuff.
Common Mistakes to Avoid :
Not checking your square size. If your squares come out bigger than 4 inches, the stocking grows fast. Make one square first, measure it, and go down a hook size if you need to.
Joining a panel the wrong way round. The back panel is a mirror image of the front, so the toe points the other way. Lay both panels out with the right side facing up before you seam, and make sure the toes point in opposite directions.
Pulling the joining seam too tight. The single crochet seam should lie flat. If your squares start to pucker along the ridge, loosen up or go up one hook size just for the joining.
Ways to Customize This Pattern :
Swap the colors for a different look. Cream centers with red middles and a green outer round give you a more traditional plaid feel, while all-white squares with a silver border look lovely for a winter wonderland theme.
Want a smaller stocking for a child or a pet? Stop each square after Round 3. The squares will be about 3 1/4 inches, and the whole stocking shrinks to roughly 17 inches tall without changing anything else in the layout.
You can also personalize it. Embroider a name across the cuff with chain stitch, or replace the top two squares on the front panel with plain red single crochet squares and stitch initials on them.
FAQ
How many granny squares do I need for this stocking?
You need 24 squares, 12 for the front panel and 12 for the back. The leg on each side is 2 squares wide and 4 squares tall, and the foot adds 4 more squares per side.
Can a beginner make this granny square stocking?
Yes. If you can chain, slip stitch and double crochet, you can make the squares. The heel, toe and ankle pieces are simple rows with a decrease at the ends, and the joining is plain single crochet.
What yarn is best for a crochet Christmas stocking?
A worsted weight (#4) acrylic or acrylic blend works best because it is sturdy, washable and comes in classic holiday reds and greens. Plan on about 450 yards of red, 130 yards of cream and 90 yards of green.
How do I make the stocking smaller?
Stop each square after Round 3 for a square of about 3 1/4 in and a stocking around 17 in tall. You can also use DK yarn with a 4 mm hook for an even smaller version, keeping the same layout.
Why are my squares not lining up when I join them?
Usually it is a gauge difference between squares made on different days. Block the squares to the same size before joining, and count 17 sc along every square edge so each seam has the same number of stitches.
Should I join the squares with slip stitch or single crochet?
I use a single crochet seam on the right side because it creates the raised red ridge you see between the squares. A slip stitch or whip stitch join from the wrong side gives a flatter finish if you prefer that look.