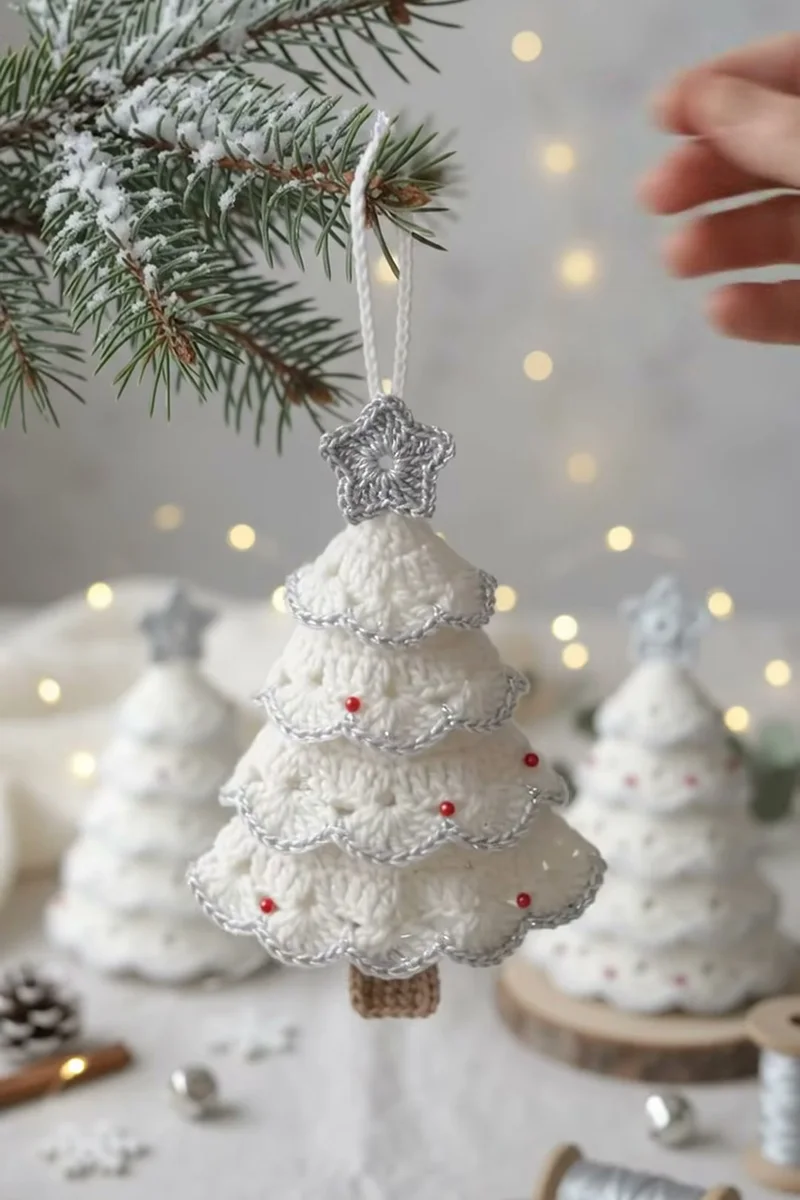
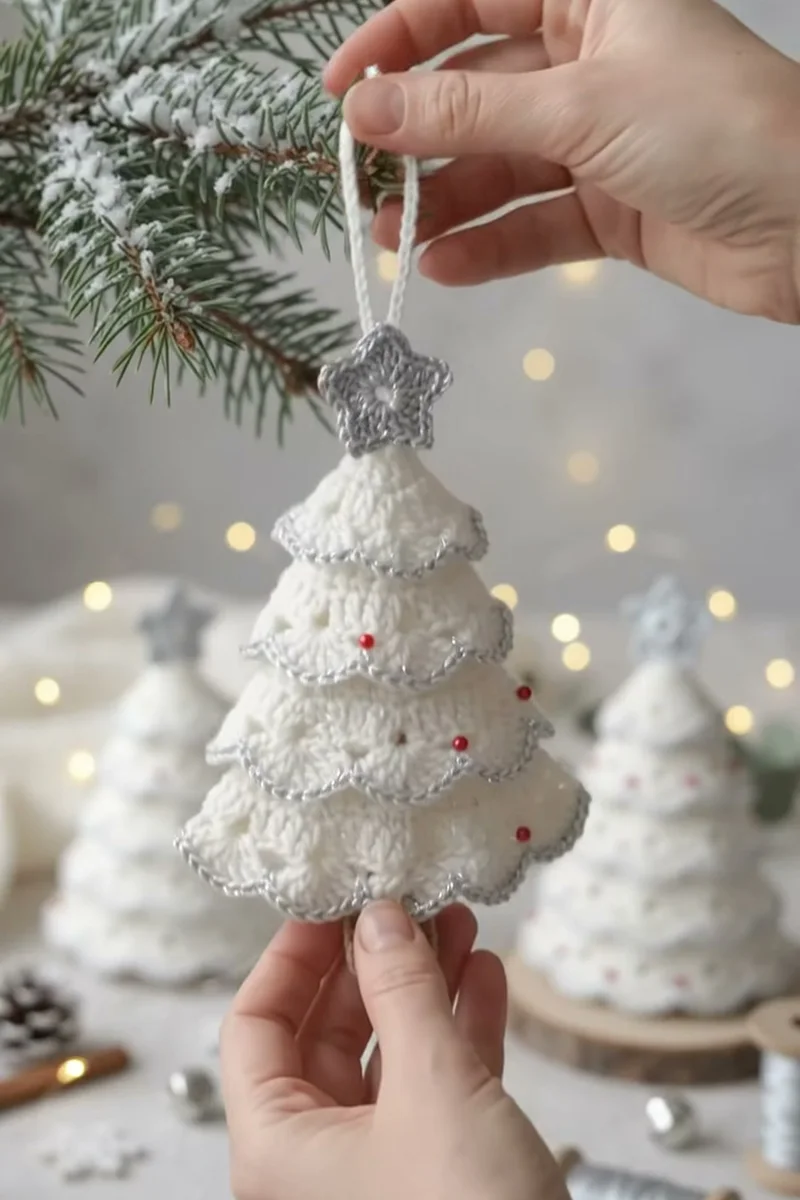
This crochet Christmas tree ornament pattern stacks six scalloped shell-stitch tiers with a silver edge, red bead dots and a little star. Easy, US terms.
This crochet Christmas tree ornament pattern makes a snowy white tree from six scalloped tiers. Each tier ends in a row of shells, a silver edge runs along every scallop, and small red dots sit on the tiers like baubles. A little silver star goes on top and a tan trunk at the bottom.
Each tier is worked flat on its own, starting with a narrow single crochet row and widening over two rows of double crochet before the shell row. The tiers go from 2 shells at the top to 7 at the bottom and are sewn so each one tucks behind the scallops of the tier above. The star, trunk, red dots and hanging loop are added at the end.
Plan on 2.5 to 3 hours for one ornament. If you can chain, single crochet and double crochet, you have every stitch you need, so this suits a confident beginner. It uses sport-weight cotton and a few yards of metallic yarn, and the finished tree is about 4.75 x 6.5 in.
🧶 Materials
Yarn
White or cream sport-weight (#2) cotton, about 45 yds (41 m) - any mercerized or matte cotton works
Silver metallic yarn or crochet thread in fine/sport weight, about 12 yds (11 m) - a metallic blend with a soft core is easier to work than pure tinsel thread
Tan or light brown sport-weight cotton, about 3 yds (3 m) for the trunk
Red embroidery floss, or 21 red seed beads (3-4 mm)
Hook
2.5 mm (US B/1 or C/2) crochet hook
Optional: 2.75 mm hook for the silver edging if your metallic yarn feels tight
Notions
Tapestry needle
Sharp sewing needle and white thread (if using beads)
Sewing pins or locking stitch markers
Scissors
Optional: white felt, 5 x 7 in, for a stiff backing
✂️ Abbreviations
ch: chain
sl st: slip stitch
sc: single crochet
hdc: half double crochet
dc: double crochet
sk: skip
st(s): stitch(es)
MR: magic ring
shell: 5 dc worked into the same stitch
* *: repeat the instructions between asterisks as directed
( ): stitch count at the end of the row
Before you start: Work a small swatch in double crochet with your sport-weight cotton and the 2.5 mm hook. You want 13 dc and 6 rows to 2 in (5 cm). Gauge is not critical for an ornament, but it sets the finished size, so a looser gauge gives you a bigger tree.
Crochet Scalloped Christmas Tree Ornament Pattern
This crochet Christmas tree ornament pattern stacks six scalloped shell-stitch tiers with a silver edge, red bead dots and a little star. Easy, US terms.
EasyBeginner-FriendlyFlat Applique⏱ 2.5-3 hrs
0% complete
Part 1: Top Tier (Tier 1, white) :
Row 1 :Ch 2, work 3 sc in 2nd ch from hook. (3 sc)
Row 2 :Ch 1, turn. 2 sc in first st, sc in next st, 2 sc in last st. (5 sc)
Row 3 :Ch 3 (counts as dc here and throughout), turn. Dc in the first st at the base of the ch, dc in next 3 sts, 2 dc in last st. (7 sts)
Row 4 :Ch 3, turn. Dc in first st, dc in each st across to the last st (the top of the turning ch), 2 dc in last st. (9 sts)
Row 5 (shells) :Ch 1, turn. Sc in first st, *sk 1, 5 dc in next st, sk 1, sc in next st* 2 times. Fasten off, leaving a 10 in tail. (2 shells, 13 sts)
Working the first part, one row at a time.
Part 2: Tiers 2 to 6 (white) :
Note :All five tiers use the same four rows; only the starting chain changes. Tier 2 = ch 10 (3 shells). Tier 3 = ch 14 (4 shells). Tier 4 = ch 18 (5 shells). Tier 5 = ch 22 (6 shells). Tier 6 = ch 26 (7 shells). Each tier's Row 1 matches the width of Row 4 / Row 3 of the tier above, so they stack cleanly.
Row 1 :Ch the number listed for your tier. Sc in 2nd ch from hook and in each ch across. (Tier 2: 9 / Tier 3: 13 / Tier 4: 17 / Tier 5: 21 / Tier 6: 25 sc)
Row 2 :Ch 3, turn. Dc in first st, dc in each st across to last st, 2 dc in last st. (Tier 2: 11 / Tier 3: 15 / Tier 4: 19 / Tier 5: 23 / Tier 6: 27 sts)
Row 3 :Ch 3, turn. Dc in first st, dc in each st across to the last st (the top of the turning ch), 2 dc in last st. Count carefully. (Tier 2: 13 / Tier 3: 17 / Tier 4: 21 / Tier 5: 25 / Tier 6: 29 sts)
Row 4 (shells) :Ch 1, turn. Sc in first st, *sk 1, 5 dc in next st, sk 1, sc in next st* repeat across, ending with sc in the last st. Fasten off, leaving a 12 in tail for sewing. (Tier 2: 3 / Tier 3: 4 / Tier 4: 5 / Tier 5: 6 / Tier 6: 7 shells)
Part 3: Silver Scallop Edging (all 6 tiers) :
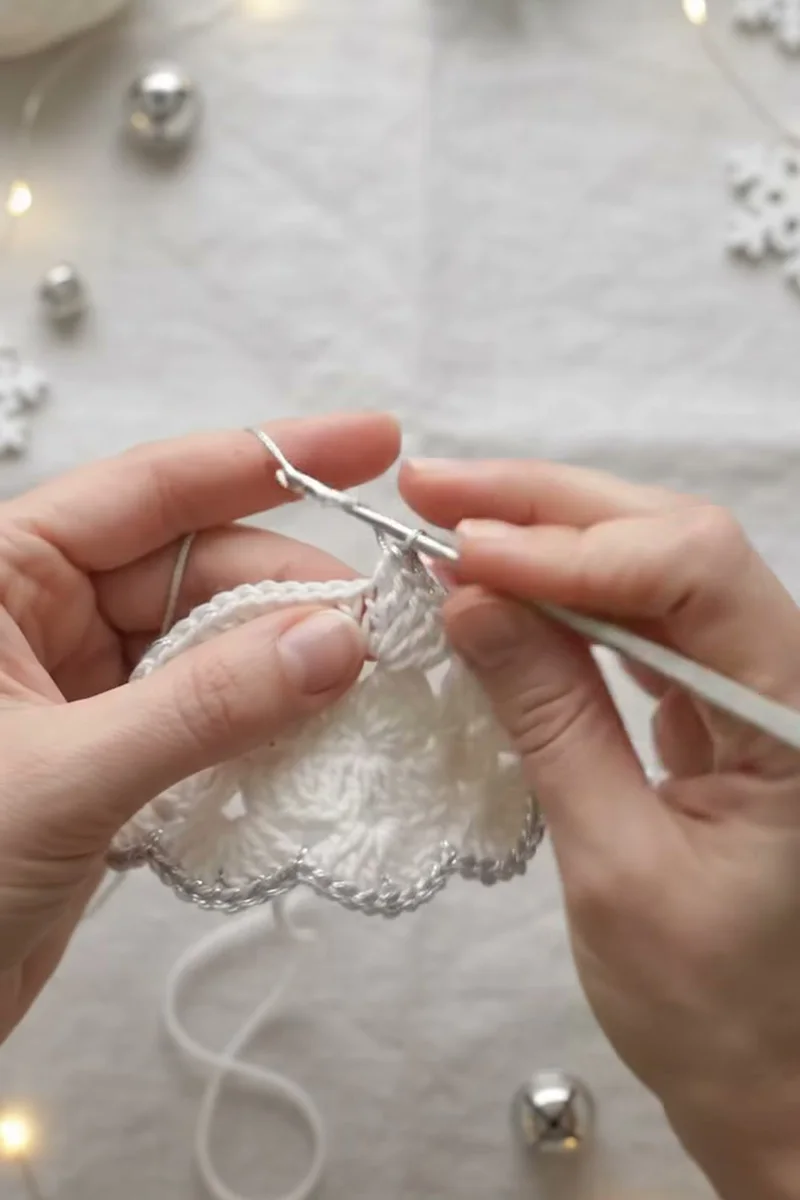
Row 1 :With the right side facing, join silver yarn with a sl st in the first sc of the shell row. Ch 1, sc in the same sc, *sc in next 2 dc, 2 sc in the center dc, sc in next 2 dc, sc in next sc* repeat across every shell. Fasten off and weave in the ends on the back. (Tier 1: 15 / Tier 2: 22 / Tier 3: 29 / Tier 4: 36 / Tier 5: 43 / Tier 6: 50 sc)
Part 4: Star (silver) :
Rnd 1 :Make a MR. Ch 1, work 10 sc into the ring, pull the ring closed until only a small hole remains, sl st to the first sc. (10 sc)
Rnd 2 (points) :*Ch 4, sl st in 2nd ch from hook, sc in next ch, hdc in next ch, sk next sc on the round, sl st in next sc* 5 times, working the last sl st into the joining st. Fasten off, leaving an 8 in tail. (5 points)
Part 5: Trunk (tan) :
Row 1 :Ch 6, sc in 2nd ch from hook and in each ch across. (5 sc)
Rows 2-7 :Ch 1, turn, sc in each st across. Fasten off after Row 7, leaving an 8 in tail. (5 sc)
Part 6: Hanging Loop (white) :
Row 1 :Leaving a 6 in tail, ch 36 (about 6 in). Fasten off, leaving a second 6 in tail. (36 ch)
Assembly :
Step 1 :Block all six tiers before sewing: pin them flat on a towel, spritz with water and let them dry. This opens the shells into neat half circles.
Step 2 :Lay Tier 1 right side up. Slide Tier 2 behind it so the top two rows of Tier 2 (the sc row and the first dc row) sit hidden behind Tier 1's shells. Tier 2's sc row is 9 sts, the same width as Tier 1's Row 4, so the edges line up.
Step 3 :Pin, then use Tier 2's tail to whipstitch its sc foundation to the back of Tier 1's Row 4, catching only the back bumps so nothing shows on the front.
Step 4 :Repeat for Tiers 3, 4, 5 and 6, each one tucked behind the tier above in the same way (its 13, 17, 21 or 25 sc foundation lines up with Row 3 of the tier above). Keep the centers lined up so the tree stays straight.
Step 5 :Center the trunk behind Tier 6. Let Rows 1-2 of the trunk sit hidden behind the shells and Rows 3-7 hang below. Whipstitch it to the back of Tier 6.
Step 6 :Add the red dots: on each tier, place one dot in a dip between two shells, just above the silver line - 1 dot on Tier 1, 2 on Tier 2, and so on up to 6 on Tier 6 (21 total). Sew on seed beads with white thread, or make French knots with 3 strands of red floss wrapped twice.
Step 7 :Fold the hanging loop in half and lay both tails behind the tip of Tier 1. Thread the tails through the top stitches, knot them securely and weave in the ends.
Step 8 :Sew the star to the tip of Tier 1 with the silver tail so the bottom two points overlap the white and the loop rises from behind the top point.
Step 9 :Optional: trace the finished tree onto white felt, cut just inside the line and glue or whipstitch it to the back to hide your sewing and stiffen the ornament.
Finishing :
Weave in every remaining tail on the back of the tree, running each one under a few stitches of its own color so nothing shows through the white. Pin the finished tree flat on a towel, mist it lightly and let it dry so the scallops sit in neat half circles.
For a stiffer ornament, sew a piece of white felt to the back before you add the hanging loop. Hand wash only if needed, and dry it flat.
Tips for Success :
Tip :💡 Finished size with the suggested yarn: about 4.75 in (12 cm) wide at the bottom tier and 6.5 in (16.5 cm) tall from the star tip to the bottom of the trunk, not counting the loop.
Tip :💡 The ch 3 at the start of a dc row counts as a stitch. The last increase of each dc row goes into the top of the turning chain from the row below.
Tip :💡 The shell row needs a multiple of 4 sts plus 1. Every tier is written to land on that count (9, 13, 17, 21, 25, 29), so if Row 3 is off, fix it before you start the shells.
Tip :💡 Bigger tree: use worsted (#4) cotton and a 4.5 mm hook for a tree around 8.5 in wide. Smaller tree: size 10 crochet thread and a 1.75 mm hook gives a tiny tree around 3 in wide.
Tip :💡 If the shells ruffle instead of lying flat, use a slightly smaller hook for the shell row only, or work 4 dc instead of 5 in each shell (the edging count then drops by 1 per shell).
Common Mistakes to Avoid :
Forgetting that the turning chain counts as a stitch. In the double crochet rows, the ch 3 is your first stitch, the first increase goes into the stitch at the base of that chain, and the last 2 dc go into the top of the previous row's turning chain. Miss that last spot and you will be short before the shell row.
Skipping the stitch count before the shells. The shell row only works on a multiple of 4 plus 1. If you are one stitch off, the last scallop will look lopsided, so count Row 3 of every tier.
Pulling the metallic yarn tight. Silver yarn has almost no stretch, and a tight edging will curl the scallops forward. Work it loosely, going up a hook size if you need to.
Sewing the tiers too low. Tuck each new tier only far enough that its sc row and first dc row hide behind the scallops above. Too much overlap squashes the tree and hides your shells.
Ways to Customize This Pattern :
Try a classic green tree with gold edging and tiny multicolor beads, or go fully Scandinavian with natural cream tiers, red edging and no beads at all.
For a smaller ornament, stop after Tier 4; you will have a sweet four-layer tree about 3.5 inches wide. For a wall hanging, use worsted cotton and a 4.5 mm hook, and the same instructions give you a tree close to twice the size.
Make two complete trees, sew them back to back with a little stuffing between them, and you get a soft, padded ornament that looks good from both sides.
FAQ
Can a beginner make this tree?
Yes. If you can chain, single crochet and double crochet, you have every stitch you need. The only new thing is the shell, which is just five double crochets worked into one stitch.
Why is each tier made separately instead of in one piece?
Separate tiers let the scallops overlap the tier below, which is what gives this tree its layered, snowy look. It also means you can stop at four or five tiers if you want a smaller tree.
My metallic yarn keeps splitting. Any tips?
Use a hook with a rounded head, work slowly and keep your tension loose. A metallic blend with a cotton or polyester core splits far less than pure tinsel thread.
Can I use acrylic yarn?
You can, but cotton gives crisper scallops and holds its shape after blocking. If you use acrylic, steam block lightly by holding the iron above the fabric instead of pressing it.
How do I make the ornament stiffer?
Back it with felt, or brush the back with fabric stiffener or a mix of 1 part white glue to 1 part water, and let it dry flat overnight.
Is it safe to hang where little kids or pets can reach?
If small hands or paws are around, skip the beads and use French knots instead, so there is nothing small that can come loose.