Follow Me On Social Media!
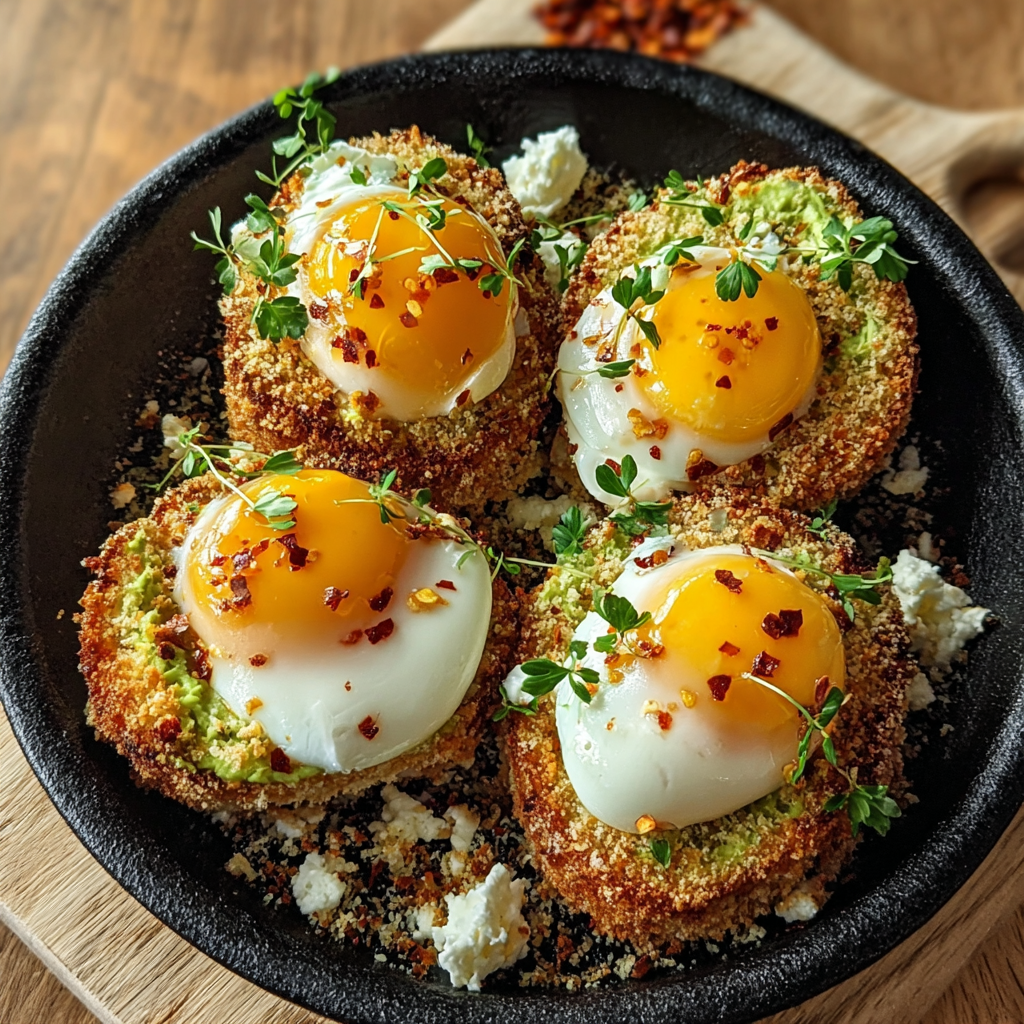
Crispy Panko Poached Eggs
Introduction
Here is a question that reframes the most technically intimidating technique in everyday cooking: what if poached eggs — the preparation that causes more home cook anxiety, more wasted eggs, and more quietly abandoned breakfast ambitions than any other single culinary skill — could be made not just reliably but spectacularly, by adding one additional step that simultaneously solves the texture problem, the presentation problem, and the temperature-management problem that makes traditional poaching so unforgiving?
According to a 2024 culinary skills survey by the Food Network, poached eggs rank as the number one technique home cooks most want to master and most consistently report failing at — with the primary complaints being ragged, wispy whites, difficulty timing multiple eggs simultaneously, and the challenge of serving them hot enough after the inevitable juggling act of draining, blotting, and plating. These crispy panko poached eggs solve all three with a single technique innovation: the eggs are poached conventionally, then immediately coated in seasoned panko breadcrumbs and pan-fried briefly in hot butter until the exterior is shatteringly golden and crispy while the interior white is set and the yolk remains fully, perfectly runny.
The result is not merely a poached egg with a crispy coating — it is a textural experience that is entirely unlike any other egg preparation: the shattering crunch of the panko crust giving way to the tender, yielding egg white, followed by the molten yolk that flows over everything the moment the fork breaks through. It is the egg preparation that turns a simple ingredient into a genuinely sophisticated dish. A 2023 food innovation report by the Culinary Institute of America identified breaded and crisped poached eggs as one of the most technically interesting contemporary egg preparations — a format borrowed from high-end restaurant kitchens and now entirely achievable at home with standard equipment and a modest amount of attention.
Ingredients List
For the Poached Eggs
- 4 large eggs, very fresh (freshness is the most important factor in poaching — check the date)
- 1.5L (6 cups) water
- 2 tbsp white wine vinegar (helps the whites coagulate quickly and neatly)
- 1 tsp fine sea salt
For the Panko Coating
- 1 cup (60g) panko breadcrumbs
- 2 tbsp Parmesan cheese, finely grated
- ½ tsp garlic powder
- ½ tsp smoked paprika
- ¼ tsp fine sea salt
- ¼ tsp freshly ground black pepper
- ¼ tsp dried thyme or dried herbs de Provence (optional — adds aromatic depth)
For Breading the Eggs
- 2 tbsp all-purpose flour, seasoned with salt and pepper
- 1 egg, beaten with 1 tbsp cold water (egg wash for adhesion)
For Frying
- 2 tbsp unsalted butter
- 1 tbsp neutral oil (prevents the butter from burning)
For Serving
- Thick-sliced sourdough, toasted (the non-negotiable base)
- Smashed avocado or sliced avocado (optional but highly recommended)
- Fresh micro herbs or flat-leaf parsley
- Flaky sea salt and cracked black pepper
- Hollandaise, sriracha, or a simple lemon vinaigrette drizzle (optional sauce)
- Cherry tomatoes, roasted (optional)
Timing
- Prep Time: 10 minutes
- Poaching Time: 3 minutes per egg
- Chilling Time: 5–10 minutes (essential for coating adhesion)
- Frying Time: 2–3 minutes
- Total Time: 25–30 minutes
The chilling step between poaching and breading is the most frequently skipped and most important step in the recipe. A warm, freshly poached egg is too soft and fragile to handle, coat, and fry without breaking — a properly chilled egg is firm, cohesive, and holds every stage of the coating and frying process with complete reliability.
Step-by-Step Instructions
Step 1: Set Up the Poaching Environment
Fill a wide, deep saucepan or skillet with the water — at least 8cm (3 inches) deep — and bring to a gentle simmer over medium heat. Add the white wine vinegar and salt. The water should show lazy, small bubbles rising intermittently — not a rolling boil, which tears the egg whites apart on contact. A vigorous simmer is the enemy of a clean poached egg; a gentle one is its best ally.
Prepare a bowl of ice water alongside the stove — large enough to hold all four poached eggs simultaneously. This ice bath is what stops the cooking at the correct moment, firms the eggs sufficiently for handling, and makes the timing of multiple eggs manageable rather than stressful.
Key tip: Fresh eggs poach significantly more cleanly than older eggs. In a fresh egg, the white is tight and cohesive and wraps around the yolk compactly. In an older egg, the white has thinned and spreads in the water, creating the wispy, ragged strands that give poached eggs their reputation for difficulty. Check the date before purchasing and use the freshest available.
Step 2: Poach the Eggs
Crack each egg individually into a small cup or ramekin — never directly into the poaching water, which eliminates any ability to control the egg’s entry and position. Create a gentle swirl in the water with a spoon and slide the first egg from the cup into the center of the swirl — the circular motion encourages the white to wrap around the yolk rather than spreading outward.
Cook for exactly 3 minutes for a fully set white with a completely runny yolk. Remove with a slotted spoon and transfer immediately to the ice water bath. Repeat with the remaining eggs, sliding each into the water in 30-second intervals if cooking multiple eggs — this staggered entry means all eggs will be ready to remove within a short window of each other.
After all eggs are in the ice bath and fully chilled — approximately 5 minutes — remove and place on a paper-towel-lined plate. Pat gently but thoroughly dry on all surfaces. Any water remaining on the egg surface will cause the flour to clump and the panko coating to detach during frying.
Key tip: The ice bath is not merely a cooling mechanism — it is a precision cooking tool. The moment an egg enters the ice water, its internal temperature stops rising and the yolk is preserved at exactly the runny consistency achieved during the 3-minute cook. Without the ice bath, carryover cooking continues and the yolk may over-set during the subsequent breading and frying steps.
Step 3: Set Up the Breading Station
Arrange three shallow dishes in the standard breading sequence. In the first, place the seasoned flour. In the second, the beaten egg wash. In the third, the combined panko, Parmesan, garlic powder, smoked paprika, salt, pepper, and thyme.
Work gently at every stage of this process — a chilled poached egg is significantly more resilient than a warm one, but it is still a delicate object. The goal is to apply a complete, even coating on all surfaces without compressing or deforming the egg.
Step 4: Bread the Poached Eggs
Working one egg at a time, dust gently in the seasoned flour on all sides — use a soft brush or your fingertips rather than pressing the egg into the flour. Shake off all excess. Dip in the egg wash, allowing the excess to drip off for 3–4 seconds. Transfer to the panko mixture and gently roll, pressing very lightly, until every surface is evenly and fully coated.
The coating will feel fragile at this stage — this is normal. The first 30 seconds of contact with the hot butter in the pan sets the coating and produces a firm, cohesive crust that becomes surprisingly robust. The fragility before frying does not predict the durability after.
Key tip: If the panko coating is not adhering evenly — leaving patches of exposed egg — the egg surface was not dry enough. Pat more firmly with paper towels and re-attempt the breading. A perfectly dry surface is the adhesion foundation for the entire coating.
Step 5: Fry the Breaded Eggs
Heat the butter and oil in a non-stick or well-seasoned cast iron skillet over medium heat until the butter has melted and is just beginning to foam — not brown, which would indicate too high a temperature. The combination of butter and oil raises the smoke point of the butter and prevents burning during the 2–3 minutes of frying required.
Place the breaded eggs carefully in the pan — do not crowd — and fry for 60–75 seconds until the bottom surface is deeply golden. Turn gently using a wide, thin spatula — the most critical moment of the recipe — and fry the second side for another 60–75 seconds. Briefly tilt the eggs on their sides to fry any remaining exposed surface areas. The entire frying process should take no more than 2.5–3 minutes — extended frying at this temperature will over-set the yolk through heat transfer through the coating.
Key tip: The temperature of the frying medium must be correct — too cool and the panko absorbs butter rather than crisping, producing a greasy coating; too hot and the panko burns before the second side has time to fry. The butter foam test is reliable: bubbling but not smoking indicates the correct temperature.
Step 6: Plate and Serve Immediately
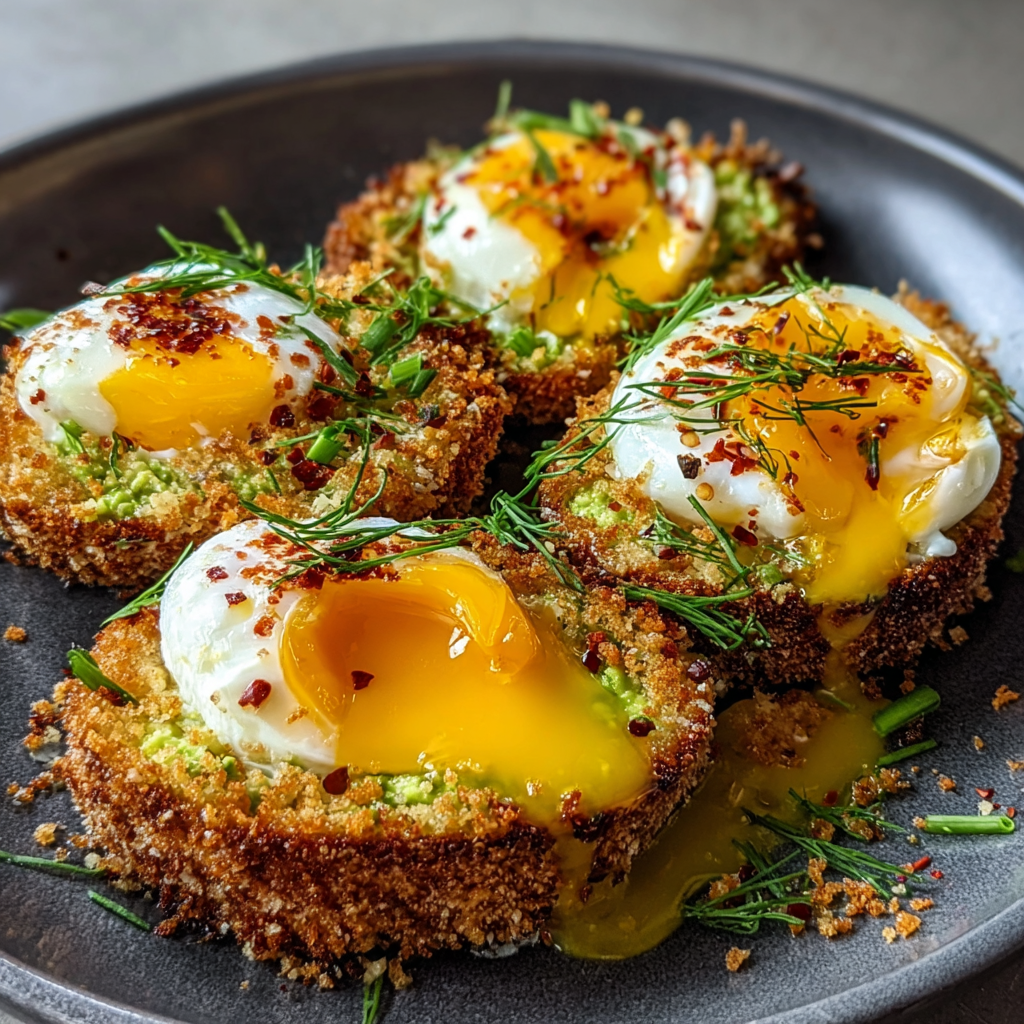
Transfer the fried eggs directly to serving plates — do not drain on paper towels, which would absorb the butter from the crust and soften the exterior. Place each egg on toasted sourdough — with smashed avocado beneath if using — and serve immediately. Add micro herbs, a pinch of flaky sea salt, cracked pepper, and any optional sauce. The yolk should be fully runny — this can be confirmed by pressing gently on the top of the egg, which should feel completely yielding with no firmness at the center.
Nutritional Information
Per serving — based on 1 breaded poached egg on sourdough toast with avocado.
| Nutrient | Per Serving | % Daily Value* |
|---|---|---|
| Calories | 420 kcal | 21% |
| Total Fat | 22g | 28% |
| Saturated Fat | 7g | 35% |
| Total Carbohydrates | 38g | 14% |
| Total Sugar | 3g | — |
| Protein | 18g | 36% |
| Dietary Fiber | 4g | 14% |
| Sodium | 580mg | 25% |
| Choline | 35% DV | 35% |
| Vitamin D | 10% DV | 10% |
| Selenium | 25% DV | 25% |
| Iron | 15% DV | 15% |
*Based on a standard 2,000-calorie daily diet.
The choline content — 35% of the daily recommended value from the egg alone — is particularly noteworthy. Choline is an essential nutrient supporting brain development, liver function, and neurotransmitter synthesis that is severely under-consumed in most Western diets, with eggs representing one of the most concentrated and bioavailable dietary sources available.
Healthier Alternatives
Gluten-free: Replace the all-purpose flour with rice flour and use certified gluten-free panko breadcrumbs. Rice flour produces a slightly lighter, crispier base coat and the flavor difference is negligible.
Lower fat: Bake the breaded eggs instead of frying — spray with cooking oil and bake at 425°F (220°C) for 8–10 minutes, turning gently halfway. The result is less dramatically golden than pan-fried but entirely crispy and satisfying with approximately 40% less fat.
Dairy-free: Replace the butter with refined coconut oil or a neutral oil entirely. The frying behavior is comparable and the flavor difference is modest — the butter’s contribution to the crust color and flavor is significant but not irreplaceable.
Higher protein: Add a slice of smoked salmon beneath the avocado and egg for an additional 10 grams of protein and a significant omega-3 boost that makes the plate genuinely nutritionally complete.
Lower carbohydrate: Replace the sourdough base with a thick slice of grilled portobello mushroom, a round of roasted sweet potato, or a halved avocado. Each alternative provides a complete base with a fraction of the carbohydrates of bread.
Serving Suggestions
Classic brunch plate: Crispy panko egg on smashed avocado sourdough with cherry tomatoes, micro herbs, flaky salt, cracked pepper, and a drizzle of sriracha or chili oil. This is the format that photographs most beautifully and delivers the complete textural experience the recipe is designed around.
Eggs Benedict upgrade: Replace a standard poached egg in any Eggs Benedict format with a crispy panko poached egg — the crunchy coating against the velvet hollandaise creates a textural contrast that makes conventional Eggs Benedict feel comparatively one-dimensional.
Salad topper: Place a crispy panko poached egg on top of a composed salad of bitter greens, shaved Parmesan, and a sharp lemon vinaigrette. When the yolk breaks, it flows into the dressing and enriches the entire salad in a way that no other topping replicates.
Ramen or noodle bowl: Place a crispy panko poached egg on top of a bowl of tonkotsu or shoyu ramen. The egg maintains its structure in the broth long enough to be eaten as a distinct textural element rather than dissolving into the soup — a genuinely compelling modification to a classic format.
Dinner preparation: Serve two crispy panko poached eggs on a bed of wilted spinach, roasted asparagus, or a gratin of cauliflower for a sophisticated, protein-rich dinner that functions in a distinctly different context from the breakfast application.
Common Mistakes to Avoid
Using older eggs. The tighter white of a fresh egg wraps cleanly around the yolk and produces a compact, well-formed poached egg that coats and fries evenly. An older egg spreads and produces an irregular shape that coats unevenly and fries inconsistently. Fresh eggs are the non-negotiable foundation of this recipe.
Poaching in vigorously boiling water. Rolling boil tears the egg whites into the wispy strands that give poached eggs their reputation for difficulty. A gentle simmer — lazy, small bubbles — is the correct poaching environment. If the water is boiling too actively, remove from heat for 30 seconds before adding the egg.
Skipping the ice bath. Without the ice bath, carryover cooking continues through the breading and frying steps and the yolk over-sets from a runny to a jammy or hard state. The ice bath is the precision instrument that locks the yolk at exactly the correct consistency.
Not drying the egg thoroughly before breading. Water on the egg surface causes the flour to dissolve into wet patches that do not accept the egg wash and panko coating evenly. Thorough drying — firm but gentle paper towel contact on all surfaces — is the adhesion prerequisite for a complete, even crust.
Frying at too high a temperature. High heat burns the panko before the second side has time to fry and before the butter can distribute evenly through the coating. Medium heat — butter foam but not smoke — produces an evenly golden crust without burning.
Pressing the egg during frying. Pressing the breaded egg with a spatula deforms the egg and risks breaking the yolk — the delicate internal structure has no protection from external pressure. Place in the pan and leave entirely undisturbed for the full 60–75 seconds of each side.
Storing Tips
Freshly made is always best. Crispy panko poached eggs are designed and calibrated for immediate consumption — the contrast between the hot, crunchy exterior and the molten yolk is the entire point of the recipe, and that contrast diminishes within minutes.
Poached eggs (without coating): Can be made ahead and stored in a container of cold water in the refrigerator for up to 2 days. When ready to serve, remove from the water, bread, and fry as directed — the advance poaching allows the technique to be broken into two stages for timing flexibility.
Breaded but unfried: Breaded eggs can be refrigerated on a parchment-lined plate for up to 1 hour before frying. Extended refrigeration causes the coating to absorb moisture from the egg surface and produce a less crispy crust.
Reheating: Not recommended — a reheated crispy panko egg is a shadow of the freshly made version, with a softened crust and an over-set yolk. The recipe is fast enough that same-day preparation is always the correct approach.
Make-ahead for a group: Poach all eggs in advance and hold in cold water in the refrigerator. Bread and fry in batches immediately before serving — the poaching step is the most time-consuming and its advance completion makes serving a group of 6–8 people entirely manageable in a single frying session.
Conclusion
Crispy panko poached eggs prove that the most technically intimidating egg preparation becomes not only reliable but spectacular with a single additional step that transforms the fragile poached egg from a test of nerve into a genuinely extraordinary breakfast experience. Shatteringly golden exterior, tender white, molten yolk — the egg preparation that makes every other version feel incomplete once you have tasted it.
Make it this weekend and share your results in the comments — tell us what you served them on, whether the yolk broke cleanly, and whether the crispy coating changed how you think about poached eggs. Leave a review, share with someone who has given up on poaching eggs, and subscribe to our newsletter for more technique-driven, flavor-first breakfast and brunch recipes every week.
FAQs
How do I know when the poached egg is ready to remove from the water? At 3 minutes in gently simmering water with vinegar, the white should be fully set — opaque throughout with no translucent areas — and the yolk should feel completely yielding when pressed very gently with the back of a spoon. If the white has any translucent patches, cook for 30 more seconds. The yolk’s doneness cannot be tested visually from above — trust the 3-minute timing and the ice bath to lock the result.
Can I make this recipe without vinegar in the poaching water? Yes — the vinegar accelerates the coagulation of the egg white proteins and produces a neater, more compact shape, but it is not strictly necessary. Without vinegar, cook in water with a generous amount of salt and ensure the water is at a very gentle simmer. The shape will be slightly less compact but the result is entirely acceptable.
What is the best way to turn the egg during frying without breaking it? Use the widest, thinnest spatula available — a fish spatula is ideal — and slide it completely beneath the egg before lifting. Support the full circumference of the egg on the spatula rather than attempting to flip with a partial grip. Tilt the pan slightly away from you and use a confident, single rolling motion rather than a tentative flip. The chilled, breaded egg is significantly more resilient than it appears — a decisive flip is less likely to break the yolk than a hesitant one.
Can I use regular breadcrumbs instead of panko? Regular breadcrumbs produce a denser, less dramatically crunchy coating than panko. The result is acceptable but noticeably different — fine dry breadcrumbs produce a thinner, more uniform coating, while panko produces the dramatic, open-textured, shattering crunch that defines this recipe. Panko is worth seeking out specifically for this application.
How do I scale this recipe for a brunch of 8 people? Poach all eggs in advance — up to 2 days ahead — and store in cold water in the refrigerator. Set up a breading station and fry in batches of 4 immediately before serving. Keeping the first batch warm in a 200°F (95°C) oven on a wire rack for up to 5 minutes while the second batch fries maintains acceptable quality — the yolk softens slightly during holding but remains runny. For groups larger than 8, consider the baked alternative method which allows the entire batch to go into the oven simultaneously.
Is there a way to make this recipe without the breading step for a simpler version? Yes — a plain poached egg following the same technique, finished with a drizzle of hot browned butter and a handful of toasted panko breadcrumbs scattered over the surface, produces a simpler but genuinely delicious alternative. The crunchy panko on top and the molten yolk beneath create a similar textural contrast with significantly less complexity and time investment. This simplified version is the appropriate weekday variation when the full breaded preparation is reserved for weekend occasions.