
Follow Me On Social Media!
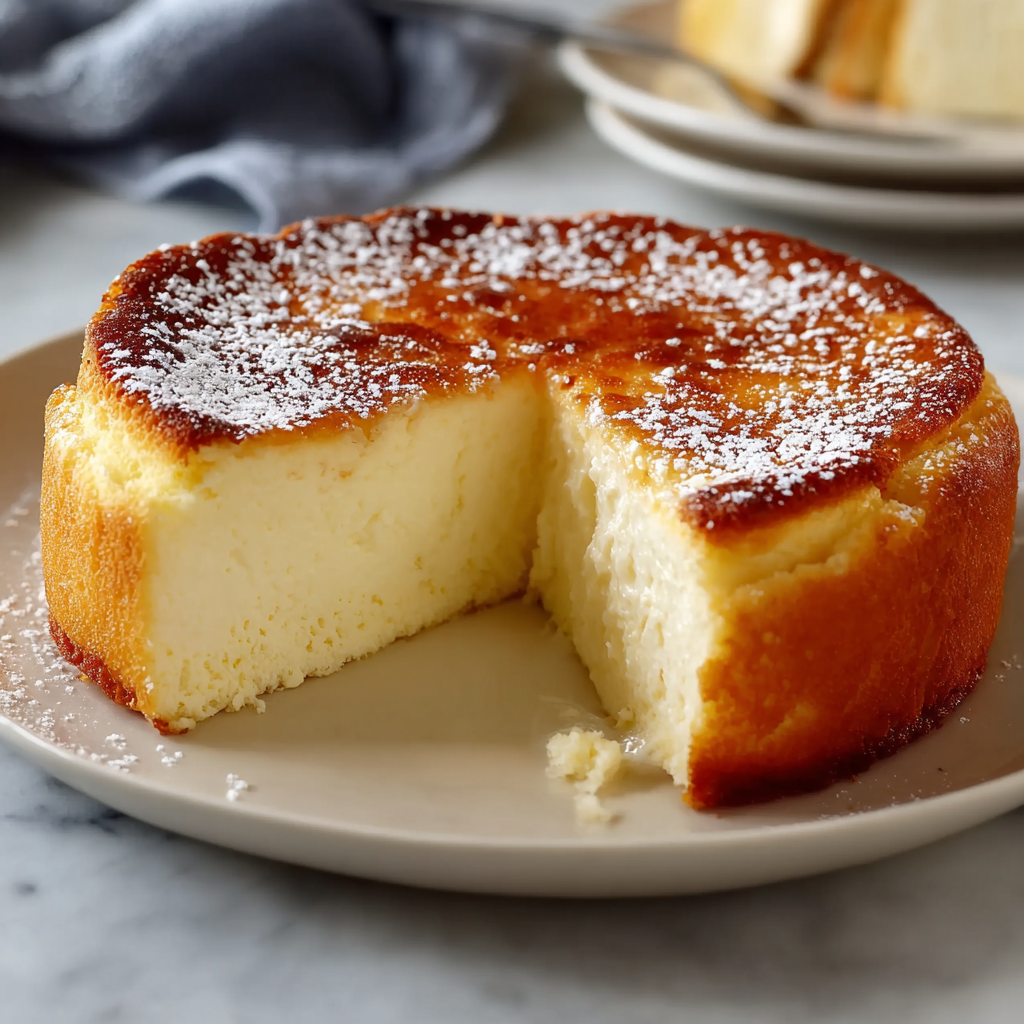
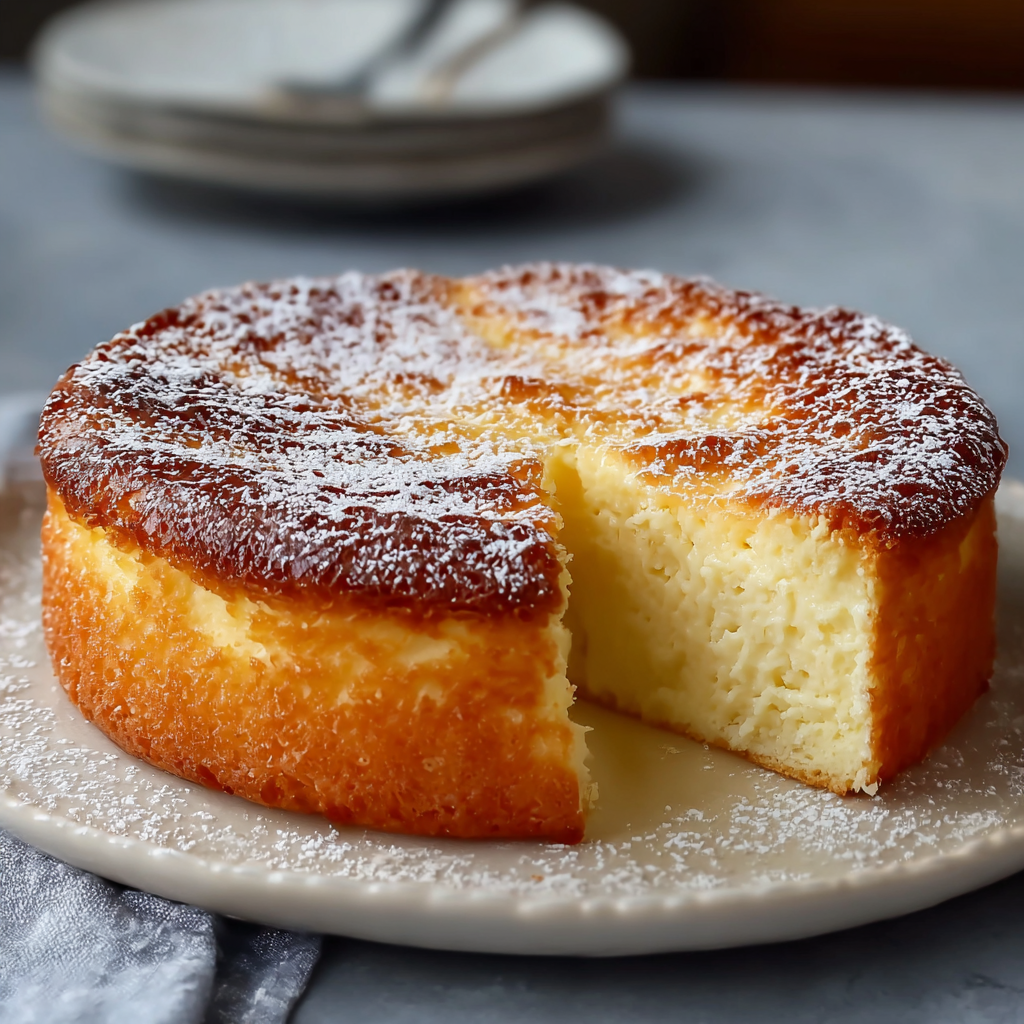
Fluffy White Cheesecake
Introduction
Here is a question worth considering the next time you reach for a dense, heavy slice of conventional cheesecake: what if the most elegant, impressive dessert you have ever served at a dinner table required nothing more than a handful of ingredients, a hand mixer, and the single technique of folding beaten egg whites into a cream cheese base? According to a 2024 report by the International Dairy Foods Association, cheesecake remains the most ordered dessert in restaurants across North America and Western Europe — yet the homemade versions that generate the most genuine admiration are not the dense New York-style bricks but the light, airy, cloud-like versions that seem to defy the richness of their ingredients.
This fluffy white cheesecake is built on the Japanese-style soufflé cheesecake technique — a method that produces a cheesecake so light it trembles when the pan is moved, so smooth it cuts like warm butter, and so delicately flavored that it tastes simultaneously like a cheesecake and a cloud. The secret is the meringue — egg whites beaten to stiff peaks and folded into the cream cheese batter — which creates thousands of air bubbles that expand during baking and give the cheesecake its signature tall, domed, impossibly fluffy interior.
A 2023 food trend analysis by Bon Appétit identified Japanese-style cheesecake as the single fastest-growing dessert search term globally, with a 58% increase in recipe searches driven by viral social media content. This recipe brings that technique within reach of any home baker, with clear explanations of every step and the science behind why each one matters.
Ingredients List
For the Cheesecake
- 250g (9 oz) full-fat cream cheese, softened to room temperature
- 60g (¼ cup) unsalted butter, softened
- 100ml (⅓ cup + 1 tbsp) whole milk
- 6 large eggs, separated into yolks and whites (room temperature — critical for volume)
- 140g (⅔ cup) granulated sugar, divided — 60g for the yolk mixture, 80g for the meringue
- 60g (½ cup) cake flour or all-purpose flour, sifted
- 20g (3 tbsp) cornstarch, sifted
- 1 tbsp fresh lemon juice
- 1 tsp lemon zest
- 1 tsp pure vanilla extract
- ¼ tsp fine sea salt
- ¼ tsp cream of tartar (stabilizes the meringue)
For the Pan
- Butter and parchment paper, for lining
- Boiling water, for the water bath
For Finishing (Optional)
- Powdered sugar, for dusting
- Fresh berries or a simple fruit compote
- Lightly sweetened whipped cream
Timing
- Prep Time: 25 minutes
- Bake Time: 60–70 minutes
- Cooling Time: 1 hour in oven + 1 hour at room temperature
- Chill Time: 4 hours or overnight
- Total Time: approximately 7 hours (mostly hands-off)
The active preparation is under 30 minutes. The rest is the oven, the cooling process, and the refrigerator — all working together to produce the characteristic texture. Rushing any stage of cooling produces a collapsed, dense result. Patience here is not optional.
Step-by-Step Instructions
Step 1: Prepare the Pan and Preheat
Preheat the oven to 320°F (160°C) with the rack in the lower third of the oven. Grease an 8-inch (20cm) round springform pan and line the bottom and sides completely with parchment paper — the sides lining is critical, as the cheesecake will rise above the rim of the pan and needs the parchment to support it. Wrap the outside of the pan tightly in two layers of heavy-duty aluminum foil to waterproof it for the water bath.
Step 2: Make the Cream Cheese Base
In a large heatproof bowl set over a pot of barely simmering water, combine the cream cheese, butter, and milk. Stir gently until completely smooth, melted, and homogenous — approximately 3–4 minutes. Remove from heat and allow to cool for 5 minutes. Whisk in the egg yolks one at a time, followed by 60g of the sugar, the lemon juice, lemon zest, vanilla, and salt. Sift the flour and cornstarch directly into the bowl and fold until just combined with no dry streaks remaining. The batter at this stage will be smooth and pourable.
Key tip: The cream cheese mixture must be warm — not hot — when the yolks are added. Hot batter scrambles the yolks. Cool batter causes the cream cheese to re-solidify into lumps. Warm is the precise target.
Step 3: Make the Meringue
In a perfectly clean, grease-free bowl, beat the egg whites and cream of tartar on medium speed until the mixture turns foamy and opaque. Add the remaining 80g of sugar in three gradual additions while continuing to beat, increasing to high speed as the meringue stiffens. Beat until the meringue holds firm, glossy peaks — peaks that stand straight when the beater is lifted without drooping. Do not over-beat into dry, clumpy whites.
Key tip: Any trace of egg yolk or fat in the bowl or on the beaters will prevent the egg whites from whipping to full volume. Separate the eggs carefully and wipe the bowl with a paper towel dampened with lemon juice or white vinegar before beginning.
Step 4: Fold the Meringue Into the Batter
Add one-third of the meringue to the cream cheese batter and stir firmly — this first addition lightens the dense batter enough to accept the remaining meringue without deflating it. Add the remaining meringue in two additions, folding with a large rubber spatula using slow, deliberate sweeping strokes — cutting down through the center, sweeping along the bottom, and folding up and over. Stop the moment the white streaks disappear. Every unnecessary fold deflates air bubbles and reduces the final height and fluffiness of the cheesecake.
Step 5: Bake in a Water Bath
Pour the batter into the prepared pan — it will fill close to the rim. Place the foil-wrapped springform pan inside a larger roasting pan. Pour boiling water into the outer roasting pan until it reaches halfway up the sides of the springform. Bake at 320°F (160°C) for 60–70 minutes until the top is a deep golden brown and the center has a slight, uniform jiggle when the pan is gently shaken. The cheesecake will have risen dramatically — possibly above the rim — and this is correct.
Key tip: Do not open the oven door for the first 50 minutes. Temperature drops cause the cheesecake to crack or collapse before the internal structure has set.
Step 6: Cool Gradually — This Step Is Not Optional
Turn off the oven. Crack the oven door open approximately 5cm and leave the cheesecake inside for 1 hour. This gradual cooling prevents the dramatic temperature change that causes Japanese cheesecakes to collapse. After the hour, remove from the oven and the water bath. Run a thin knife around the edge of the pan to release any sticking. Cool at room temperature for 1 further hour, then refrigerate for a minimum of 4 hours — overnight is strongly preferred.
Step 7: Unmold and Serve
Release the springform ring carefully. Peel the parchment from the sides. Transfer to a serving plate and dust generously with powdered sugar through a fine mesh sieve. Serve with fresh berries, a fruit compote, or lightly sweetened whipped cream. Slice with a long, thin knife wiped clean between each cut.
Nutritional Information
Per serving — based on 10 servings without toppings.
| Nutrient | Per Serving | % Daily Value* |
|---|---|---|
| Calories | 265 kcal | 13% |
| Total Fat | 17g | 22% |
| Saturated Fat | 9g | 45% |
| Total Carbohydrates | 22g | 8% |
| Total Sugar | 16g | — |
| Protein | 7g | 14% |
| Dietary Fiber | 0g | 0% |
| Sodium | 180mg | 8% |
| Calcium | 6% DV | 6% |
| Vitamin A | 15% DV | 15% |
| Iron | 4% DV | 4% |
*Based on a standard 2,000-calorie daily diet.
At 265 calories per slice — significantly lower than a standard New York cheesecake slice at 400–450 calories — this fluffy cheesecake delivers the indulgence of the format with a meaningfully lighter nutritional footprint, driven by the egg white technique that replaces dense cream with air.
Healthier Alternatives
Lower fat: Replace half the cream cheese with well-drained, blended low-fat cottage cheese. The texture remains smooth and the flavor stays rich, with the fat content reduced by approximately 30%.
Lower sugar: Reduce the total sugar to 100g split proportionally between the yolk mixture and meringue. The cheesecake will be subtly sweet rather than distinctly so — which many people find more elegant and versatile as a dessert base for fruit toppings.
Gluten-free: Replace the cake flour with a certified gluten-free 1:1 baking flour blend. The cornstarch in the recipe already provides significant structural support, meaning the substitution produces a nearly identical result.
Dairy-free: Replace cream cheese with a high-quality vegan cream cheese and use plant-based butter and oat milk. The meringue technique remains identical. The texture will be slightly less rich but the airy quality of the cheesecake is preserved through the egg white technique.
No water bath alternative: Place a deep oven-safe pan filled with boiling water on the rack below the cheesecake rather than setting the pan directly in water. This produces approximately 80% of the humidity benefit without the waterproofing logistics — suitable for those without a large roasting pan.
Serving Suggestions
Simple powdered sugar: The most traditional and elegant finish — a fine dusting of powdered sugar over the domed top, served plain. The restraint allows the texture and flavor of the cheesecake itself to remain the centerpiece.
Fresh strawberry compote: Cook 250g of halved strawberries with 2 tablespoons of sugar and 1 tablespoon of lemon juice over medium heat for 8 minutes until jammy. Cool completely and spoon over individual slices at the table rather than over the whole cake.
Mango and passion fruit: Spoon fresh diced mango and passion fruit pulp over the top just before serving. The sharp acidity of tropical fruit against the delicate, milky sweetness of the cheesecake is one of the most compelling flavor contrasts in dessert.
Matcha dusting: Replace the powdered sugar dusting with a mixture of 1 teaspoon of ceremonial grade matcha powder and 2 teaspoons of powdered sugar. The earthy bitterness of the matcha creates an elegant visual and flavor contrast against the pale, delicate cheesecake.
With black sesame cream: Whip 200ml of heavy cream with 2 tablespoons of black sesame paste and 1 tablespoon of honey to soft peaks. Serve a small cloud alongside each slice. The nutty, slightly bitter sesame cream against the sweet, airy cheesecake is a sophisticated pairing with a distinctly Japanese aesthetic.
Common Mistakes to Avoid
Cold cream cheese. Cold cream cheese will not blend smoothly with the warm milk and butter, creating a lumpy batter that no amount of whisking can fully resolve. Soften to genuine room temperature — at least 1 hour out of the refrigerator.
Over-beating the meringue. Stiff, glossy peaks are the target. Dry, clumpy, over-beaten whites cannot be folded smoothly into the batter — they break into chunks rather than incorporating as a uniform foam, producing an uneven texture in the finished cheesecake.
Aggressive folding. The purpose of folding is air preservation. Stirring, beating, or folding too many times destroys the air bubbles that produce the characteristic height and fluffiness. Use the minimum strokes necessary to eliminate white streaks — typically 12 to 15 deliberate folds.
Opening the oven too early. The internal structure of the cheesecake is not set for the first 50 minutes. A sudden temperature drop causes the risen batter to collapse before it can set, producing a dense, sunken result.
Cooling too quickly. The gradual oven cool-down is the single most commonly skipped step and produces the single most catastrophic result — a dramatically collapsed cheesecake that contracts rapidly as it meets room temperature air. One hour in the oven with the door cracked is not optional.
Cutting without wiping the knife. The cheesecake’s delicate texture tears rather than cuts if the knife accumulates filling between slices. Wipe clean with a damp cloth between every single cut for the cleanest, most attractive slices.
Storing Tips
Refrigerator: Store covered loosely with plastic wrap or in a cake dome for up to 4 days. The texture changes slightly over time — the cheesecake becomes denser as the air bubbles gradually compress — but remains delicious throughout.
Serving temperature: Remove from the refrigerator 20 minutes before serving. Cold cheesecake is firmer and the flavor is muted — at slightly warmer than refrigerator temperature the texture reaches its most delicate, cloud-like state and the vanilla and lemon flavors become fully expressive.
Freezer: Slice, wrap individual portions in plastic wrap, and freeze for up to 1 month. Thaw overnight in the refrigerator. The texture after freezing is slightly denser than fresh but retains much of the original lightness — particularly if thawed slowly.
Make-ahead: This cheesecake is ideally made the day before serving. The overnight refrigeration firms the structure, settles the flavors, and produces a cleaner, more cohesive slice than a cheesecake served on the day of baking.
Conclusion
This fluffy white cheesecake proves that the most impressive dessert at any table is not always the most complicated. Beaten egg whites, a carefully folded batter, a patient water bath, and a gradual cool-down produce a cheesecake that trembles, melts, and astonishes in equal measure — at 265 calories a slice and under 30 minutes of active work.
Make it for your next occasion and share your results in the comments — tell us whether you achieved the dome, which topping you chose, and whether it earned the reaction it deserves. Leave a review, share this with someone who loves cheesecake, and subscribe to our newsletter for more technique-driven, show-stopping dessert recipes every week.
FAQs
Why did my cheesecake collapse after baking? Collapse is almost always caused by one of three things: opening the oven door too early, cooling too rapidly by removing the cheesecake from the oven immediately after baking, or an under-beaten meringue that did not provide sufficient structural air. The one-hour gradual cool-down inside the oven with the door cracked is the most important single step for preventing collapse.
Can I make this without a springform pan? A deep 8-inch round cake pan lined completely with parchment paper — with enough overhang to lift the cheesecake out — works as a substitute. The release will be less clean than a springform but entirely manageable with careful parchment handling.
Why is my cheesecake cracked on top? Cracking occurs from overbaking, too high an oven temperature, or insufficient humidity from the water bath. Ensure the foil seal is tight, the oven is accurately calibrated, and the cheesecake is pulled while the center still has a slight jiggle. A powdered sugar dusting covers most surface cracks completely.
Can I use a different size pan? A 9-inch (23cm) pan produces a wider, slightly shorter cheesecake with a reduced bake time of 50–55 minutes. A 7-inch (18cm) pan produces a taller cheesecake with an increased bake time of 70–80 minutes. Adjust accordingly and rely on the visual and jiggle test rather than the timer alone.
Is the water bath absolutely necessary? The water bath is strongly recommended for the smoothest texture, the highest rise, and the most even bake. The alternative — a pan of boiling water on the rack below — produces approximately 80% of the result with less logistics. Skipping humidity entirely produces a drier, denser cheesecake that is still good but notably different from the intended result.
How do I know when it is done? The top should be a deep, even golden brown and the cheesecake should have a uniform, gentle jiggle across the entire surface — not just the center — when the pan is gently shaken. A cheesecake that jiggles only in the center is underdone. One that does not jiggle at all is overdone and will be dense rather than fluffy.