
Follow Me On Social Media!
2-Ingredient Apple Pie Cups
Make flaky apple pie cups with just puff pastry and apple pie filling. Includes the full recipe, baking tips, optional toppings, storage, and troubleshooting.

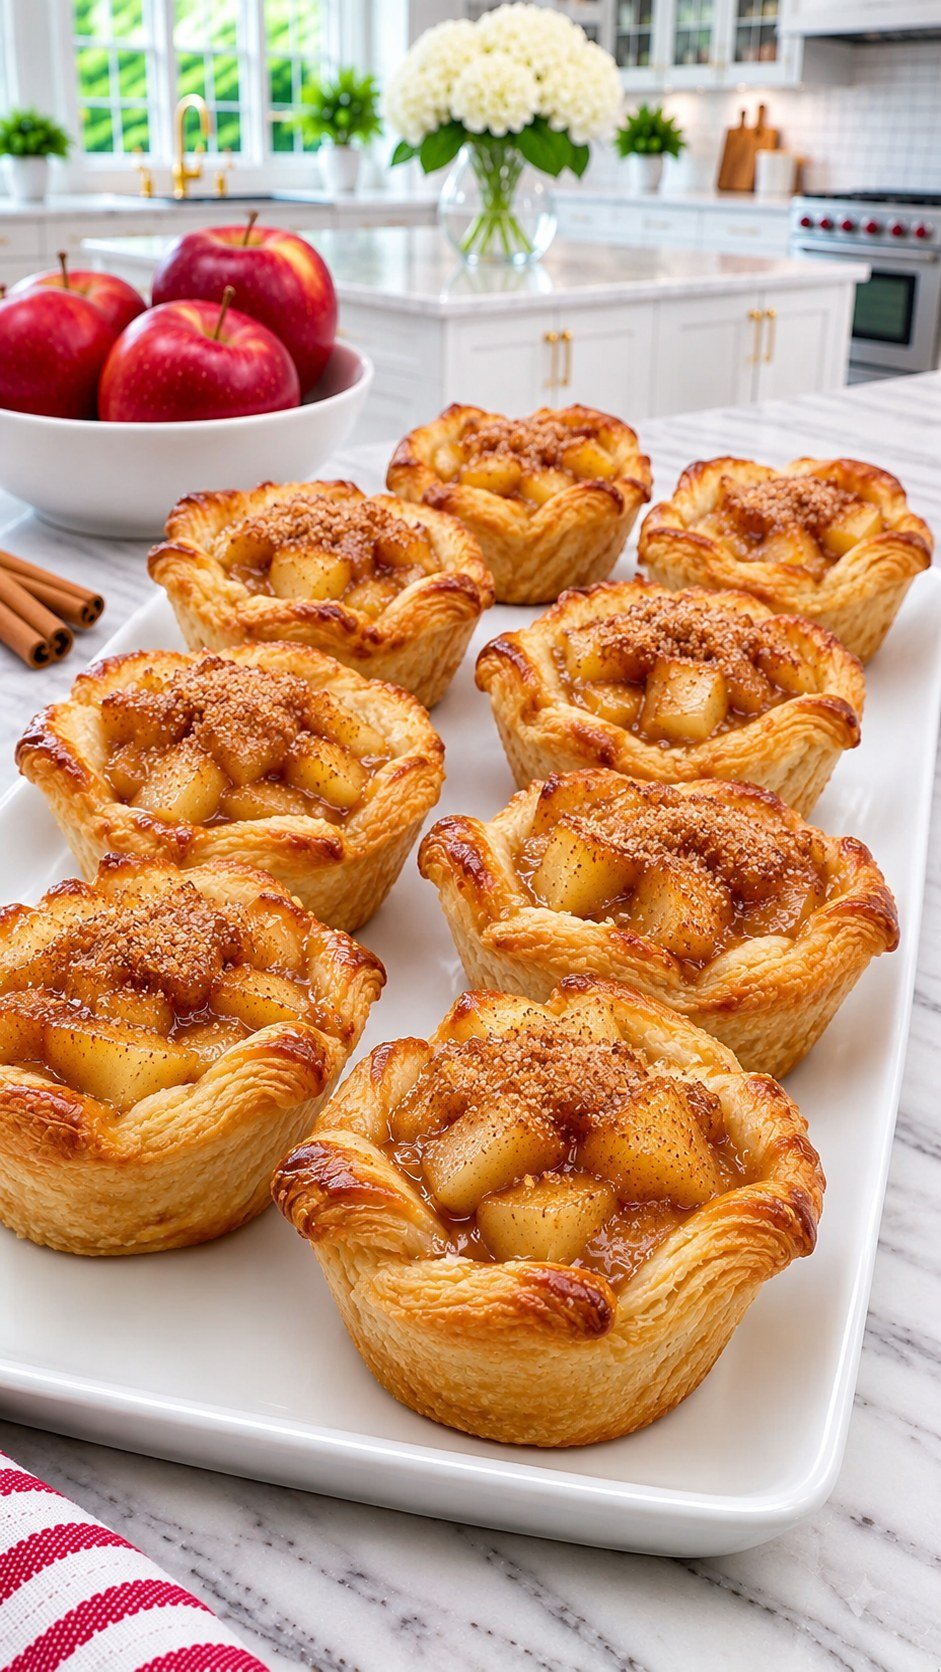
These 2-Ingredient Apple Pie Cups give you flaky pastry, tender apples, and a warm dessert aroma without making a full pie. Squares of ready-made puff pastry tuck into a muffin tin and hold spoonfuls of apple pie filling. The oven does the rest, turning the edges golden while the filling bubbles gently in the middle.
This version uses puff pastry to create the layered, open-topped cups pictured above. You do not need to peel apples, prepare a thickener, or mix pastry from scratch. A package of puff pastry and a can of apple pie filling are the two recipe ingredients. A light coating of pan grease is simply there to help you remove the finished cups.
Serve them slightly warm for a simple dessert, set them out on a brunch platter, or make a small batch when you want apple pie flavor without a large pie left over. Their individual portions are easy to share, and the muffin tin helps them hold their shape as they bake.
Why You’ll Love These Apple Pie Cups
- Two main ingredients: Store-bought pastry and prepared pie filling keep the preparation short.
- No homemade crust: The puff pastry already contains the layers that create a flaky shell.
- Individual servings: Each cup is easy to lift onto a plate.
- A flexible finish: Serve plain or add optional toppings separately.
- A small amount of hands-on work: Most of the time is baking and cooling.
Choosing the Right Pastry
Choose ready-made puff pastry sheets, not a block of pastry unless you are happy to roll it out. The pastry should be thawed according to the package directions but still cool when you cut it. Warm pastry can stick to the counter and lose its shape as you transfer it.
Package sizes vary. This recipe uses approximately 17 ounces (480-500 g) total, usually two sheets. Roll or gently adjust each sheet to roughly 9 by 12 inches and cut it into six squares, about 4 inches across. Slightly irregular squares are fine; the corners become the decorative edges of the cups.
Pie crust, phyllo, and cinnamon roll dough are different products. They can make other apple desserts, but they will not behave like puff pastry using these exact directions. For the layered appearance shown here, stick with puff pastry.
Choosing Apple Pie Filling
Use prepared apple pie filling with a thick sauce, rather than plain canned apple slices. The filling has already been sweetened and thickened, so you do not need extra sugar, flour, or cornstarch.
Some brands contain large wedges. Cut those into smaller, bite-size pieces before measuring so each cup gets a balanced mix of apple and sauce. Keep the sauce that clings to the fruit, but do not fill a pastry shell with mostly syrup. A mound of chunky filling is easier to contain than a pool of liquid.
Taste a small spoonful before you begin. If you enjoy the flavor straight from the can, it is a good starting point for this shortcut recipe. A filling that tastes overly sweet will still taste sweet after baking; serving with unsweetened yogurt can provide balance.
2-Ingredient Apple Pie Cups Recipe
Yield: 12 cups
Prep: 15 minutes
Bake: 20-25 minutes
Cooling: 10-15 minutes
Total: Approximately 45-55 minutes, plus pastry thawing
Oven: 400°F (200°C), or 375°F (190°C) fan
Ingredients
- About 17 ounces (480-500 g) puff pastry sheets, thawed but cold
- 2 cups prepared apple pie filling, large apple pieces chopped smaller
For the pan: A little cooking spray or butter, if needed for your muffin tin. Depending on the brand, a 21-ounce can of filling may leave a little extra; measure the amount rather than emptying the whole can into the cups.
Equipment
- A standard 12-cup metal muffin tin
- A rolling pin, if the pastry needs light rolling
- A knife or pizza cutter
- A spoon and a wire cooling rack
Step-by-Step Instructions
- Preheat and prepare. Heat the oven to 400°F (200°C). Lightly grease the muffin wells if your pan needs it. Allow the puff pastry to thaw according to its package, then keep it refrigerated until you are ready to work.
- Prepare the filling. Chop any large apple wedges into small chunks. Measure 2 cups of filling and set aside. Do not add water or thin the sauce.
- Cut the pastry. Unfold the cold sheets on their packaging paper or a clean work surface. Gently roll each to roughly 9 by 12 inches if necessary. Cut each sheet into six approximately 4-inch squares for 12 squares total.
- Shape the cups. Press one square gently into each muffin well, easing it into the bottom corners instead of stretching it. Let the pastry points extend above the rim. Keep the center open rather than folding the corners across the filling.
- Fill modestly. Divide the filling evenly among the cups, about 2 tablespoons plus 2 teaspoons per cup. The filling should sit below the highest pastry edges. Avoid overflowing the shells.
- Bake. Bake on the middle rack for 20-25 minutes, until the pastry is well risen and golden and the filling is hot. Check from 18 minutes because pastry thickness and pans vary. If the tips color too quickly, cover loosely with foil and continue baking until the bases are cooked.
- Cool and release. Leave the cups in the pan for 10 minutes so the pastry firms and the filling settles. Carefully loosen the edges with a small spatula, then transfer to a wire rack. Let cool a little longer before serving; the filling can remain very hot.
How to Get Flaky Pastry and a Cooked Base
Cold pastry and a fully preheated oven give the layers a better chance to rise. If the pastry feels warm and floppy after shaping, refrigerate the filled tin for 10 minutes before baking. Count that as extra preparation time rather than skipping the oven preheat.
Do not press the dough into a paper-thin layer. Gentle shaping keeps enough thickness to support the apples. At the same time, avoid gathering several thick folds at the bottom, where the dough can remain soft after the corners brown.
A metal muffin tin generally gives a more defined, browned shell than a flexible silicone pan. Pan color also affects browning, so use the appearance of the pastry as well as the clock. Once a cup is firm enough to lift, the base should look baked rather than wet and translucent.
Cooling on a rack helps steam escape. Leaving the cups in the muffin tin until completely cold can soften their bottoms. Give them enough time to hold together, then move them out of the pan.
Keeping the Recipe to Two Ingredients
The base recipe does not need egg wash, extra cinnamon, sugar, or butter brushed onto the pastry. Puff pastry can brown without egg wash, and the filling supplies sweetness and apple flavor.
Your photo shows a sprinkled finish. If you want a similar look, you can add cinnamon sugar or a little finely crushed cookie after baking, but that is an optional extra ingredient. The two-ingredient cups are complete without it.
Likewise, ice cream, caramel sauce, whipped cream, and icing are serving additions rather than part of the core recipe. Keeping them separate makes it easy to serve the plain cups to anyone who prefers a simpler dessert.
Optional Serving Ideas
A warm cup with vanilla ice cream makes a classic dessert. Set the cup on a plate rather than holding it in your hand if you add a melting topping. For brunch, serve the cups slightly warm with coffee or tea and a bowl of plain yogurt.
A small dusting of powdered sugar looks pretty once the pastry has cooled enough that it will not immediately dissolve. A thin drizzle of caramel is another option, although the filling is already sweet, so start with less than you think you need.
For a dessert platter, arrange the cups in a single layer so their edges stay intact. These are best served the day they are baked, when the contrast between flaky pastry and soft apples is strongest.
Make-Ahead, Storage, and Reheating
You can cut the pastry squares ahead and keep them chilled, separated with parchment and covered so they do not dry out. Chop the filling separately and refrigerate it in a covered container. Assemble close to baking time to reduce the amount of moisture the raw pastry absorbs.
Once baked, let the cups cool, then refrigerate in a covered container for up to 3 days for best quality. Do not stack warm cups, since trapped steam softens the pastry. Separate layers with parchment if you must stack them after cooling.
To refresh refrigerated cups, place them on a tray in a 350°F (175°C) oven for about 8-12 minutes, or until warmed through and the edges regain some crispness. Check frequently and cover loosely if the pastry begins to darken. A microwave warms the filling quickly but makes the shell softer.
For freezing, wrap the baked, cooled cups individually and place in a freezer container for up to 1 month for best texture. Thaw in the refrigerator before reheating. Expect the pastry to be slightly softer than a freshly baked batch.
Troubleshooting
The Filling Overflowed
The cups may have been overfilled or contained too much loose sauce. Use the measured amount and leave room below the pastry tips. If some filling spills onto the pan, loosen it carefully while still slightly warm rather than letting the sticky sauce harden completely.
The Pastry Tips Burned Before the Bottom Cooked
Move the pan to the middle rack if it was near the top. Cover the tips loosely with foil and continue baking. Next time, avoid overly thick folds at the base and make sure the oven is fully preheated.
The Cups Stuck to the Tin
A little pan grease can help, particularly with older pans. Let the cups firm for about 10 minutes before loosening them. Pulling on the delicate corners immediately after baking can tear the shell while the filling is still soft.
Frequently Asked Questions
Can I Use Fresh Apples Instead?
Not as a direct two-ingredient swap. Fresh apples need a separately prepared filling with suitable seasoning and thickening, and raw chunks may not soften adequately during the pastry’s baking time. Use prepared pie filling for these directions.
Can I Make Six Cups?
Yes. Use one pastry sheet, about 8 1/2 ounces (240-250 g), and 1 cup of filling. The baking time stays similar because each cup is the same size. Use a six-cup pan if available.
Can I Use Another Fruit Filling?
Thick cherry or peach pie filling can work as a variation. Chop large pieces and keep the portions modest. A very loose or watery filling can soften the pastry more than apple filling.
Do I Need Paper Cupcake Liners?
No. The pastry forms its own shell inside the muffin well. Paper liners can collect moisture and make it harder to assess whether the bottom is baked.
What If My Pastry Package Gives a Different Temperature?
Check its baking guidance, especially if it is a specialty dough. This recipe is designed for conventional puff pastry baked around 400°F (200°C). Follow any manufacturer restrictions and use the pastry’s color and texture to judge when it is ready.