Follow Me On Social Media!
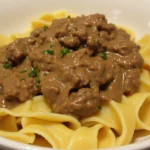
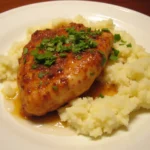
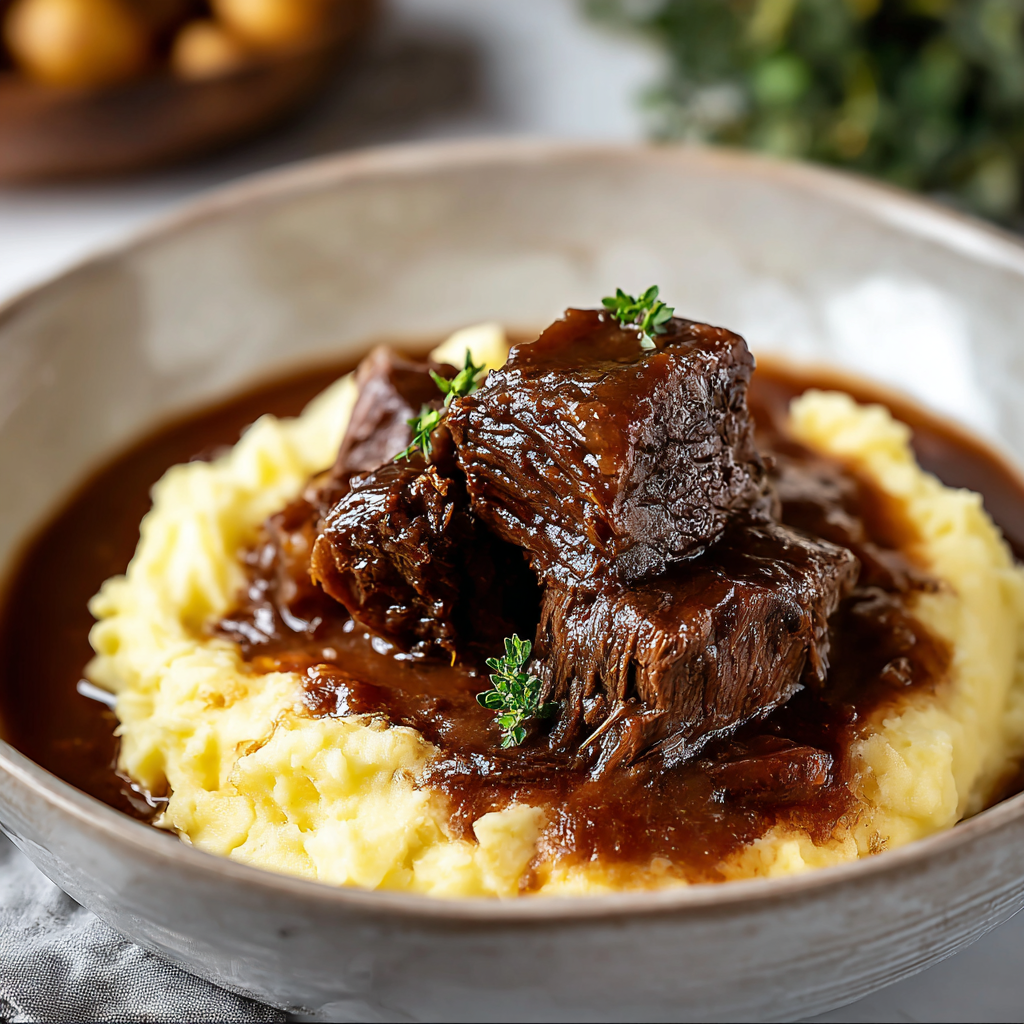
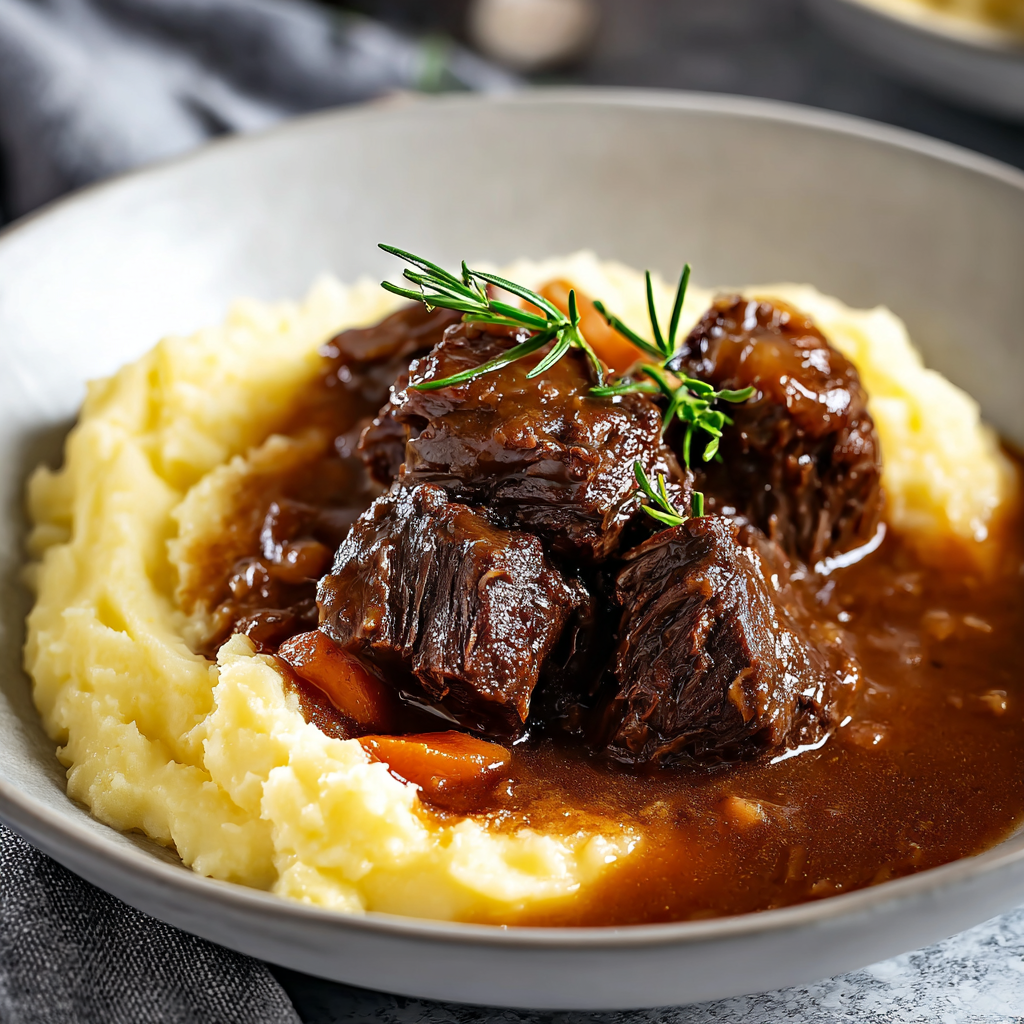
Braised Beef in Sauce with Homemade Mashed Potatoes
Introduction
Here is a question that cuts straight to the heart of comfort food culture: when was the last time a meal stopped you mid-bite, made you set down your fork, and simply made you feel genuinely, deeply satisfied in the way that only slow-cooked food can? According to a 2023 survey by the Food Network, braised beef ranks as the number one comfort meal requested at family gatherings across North America and Western Europe — ahead of roast chicken, pasta, and even pizza. And yet, despite its legendary reputation, fewer than 20% of home cooks have ever attempted it from scratch, convinced it belongs exclusively in the domain of professional chefs and Sunday restaurants.
This braised beef in sauce with homemade mashed potatoes recipe is here to permanently correct that misconception. Braising — the technique of searing protein at high heat and then cooking it low and slow in a deeply flavored liquid — is one of the most forgiving, foolproof methods in all of cooking. It transforms the toughest, most economical cuts of beef into something that pulls apart with a spoon, melts on the tongue, and leaves behind a rich, glossy sauce that tastes as though it has been simmering on a restaurant stove for days.
Paired with homemade mashed potatoes — buttery, silky, perfectly seasoned — this is a complete meal that earns its place as the centerpiece of any table, from a quiet Tuesday evening to a celebratory Sunday lunch. A 2024 culinary trends report by Bon Appétit noted a 52% increase in home braising searches, driven by a cultural rediscovery of slow cooking and the undeniable satisfaction of a meal built entirely from patience and good ingredients. Let’s build one of those meals right now.
Ingredients List
For the Braised Beef
- 1.5kg (3.3 lbs) beef chuck roast, cut into large 5–6cm (2-inch) chunks (sub: beef short ribs, beef brisket, or oxtail — all braise beautifully)
- 2 tsp fine sea salt, plus more to taste
- 1 tsp freshly ground black pepper
- 2 tbsp neutral oil (vegetable, canola, or avocado oil — for high-heat searing)
- 1 large onion, roughly diced
- 3 medium carrots, cut into 2-inch pieces
- 4 celery stalks, cut into 2-inch pieces
- 8 garlic cloves, smashed and peeled
- 2 tbsp tomato paste
- 1½ cups (360ml) dry red wine (sub: additional beef broth with 1 tbsp balsamic vinegar)
- 2 cups (480ml) good-quality beef stock or broth
- 1 can (400g / 14 oz) crushed tomatoes
- 2 sprigs fresh rosemary
- 4 sprigs fresh thyme
- 2 bay leaves
- 1 tbsp Worcestershire sauce
- 1 tsp smoked paprika
- ½ tsp dried oregano
For the Sauce Finish
- 2 tbsp unsalted butter, cold and cubed
- 1 tbsp fresh flat-leaf parsley, finely chopped
- Salt and pepper, to taste
For the Homemade Mashed Potatoes
- 1.2kg (2.6 lbs) Yukon Gold potatoes (sub: Maris Piper or Russet — Yukon Gold produces the silkiest result)
- 120g (½ cup / 1 stick) unsalted butter, cut into cubes, at room temperature
- ¾ cup (180ml) heavy cream or whole milk, warmed (sub: oat milk and plant-based butter for dairy-free)
- 1½ tsp fine sea salt, or to taste
- ¼ tsp white pepper (white pepper gives a cleaner heat than black pepper in mashed potatoes)
- Optional: 2 tbsp sour cream for extra richness and subtle tang
Timing
- Prep Time: 25 minutes
- Searing Time: 15 minutes
- Braise Time: 2.5–3 hours
- Mashed Potatoes: 30 minutes (prepared during the final hour of braising)
- Total Time: approximately 3.5 hours
Context worth appreciating: of the 3.5 total hours, only 40 minutes require your active, hands-on attention. The remaining time is the oven doing the work — slowly breaking down the tough collagen fibers in the beef into rich, silky gelatin that thickens the sauce and creates the characteristic melt-in-your-mouth texture braised beef is celebrated for. This is cooking that rewards patience in a way that very few other techniques can match. The low and slow approach also allows the flavors to develop a complexity that is simply not achievable through any faster cooking method.
Step-by-Step Instructions
Step 1: Season and Prep the Beef
Remove the beef from the refrigerator 30 minutes before cooking to allow it to come to room temperature. This promotes more even cooking throughout the braise and better browning on the exterior. Pat each piece completely dry with paper towels — this is the single most impactful step for achieving a deep, caramelized sear. Season generously on all sides with salt and pepper, pressing the seasoning firmly into the surface of the meat.
Cut the beef chuck into large, even chunks if it is not already portioned. Large pieces — approximately 5–6cm (2 inches) — are preferable to small ones, as they hold their shape through the long braise and produce more satisfying, substantial pieces on the plate rather than shredding into a pulled texture.
Key tip: Season the beef at least 15 minutes before searing, or ideally the night before and refrigerated uncovered. Pre-seasoning allows the salt to penetrate the muscle fibers rather than simply coating the surface, resulting in meat that is seasoned throughout rather than only on the exterior.
Step 2: Sear the Beef in Batches
Preheat your oven to 325°F (160°C). Heat a large Dutch oven or heavy-bottomed oven-safe pot over high heat until very hot — approximately 2–3 minutes. Add the neutral oil and allow it to heat until it begins to shimmer and just approaches smoking. Working in batches of 3–4 pieces maximum, add the beef to the pot in a single layer without crowding.
Sear without moving for 3–4 minutes until a deep mahogany crust forms on the underside — resist the urge to check or move the meat. When the beef releases naturally from the pan and has developed a proper crust, it is ready to turn. Sear for another 2–3 minutes on the second side and briefly on any remaining exposed sides. Transfer the seared pieces to a plate and repeat with the remaining beef. Do not discard the fat and fond — those caramelized brown bits on the bottom of the pot are concentrated flavor that will become the foundation of the sauce.
Key tip: The Maillard reaction — the chemical process responsible for the browned, complex flavors of seared meat — requires high heat, a dry surface, and patience. If the beef steams rather than sears, the pan is too cool or too crowded. Both result in grey, pale meat that lacks the depth a proper sear contributes to the finished dish.
Step 3: Build the Aromatic Base
Reduce the heat to medium. In the same pot with the residual fat from the beef, add the diced onion, carrots, and celery. Cook, stirring occasionally, for 6–8 minutes until the vegetables are softened and beginning to caramelize at the edges. Add the smashed garlic cloves and cook for another 2 minutes until fragrant.
Add the tomato paste and stir it into the vegetables, pressing it against the hot surface of the pot. Cook for 2–3 minutes, stirring constantly — this step caramelizes the tomato paste, removes its raw, slightly metallic flavor, and adds a deep, jammy sweetness to the foundation of the sauce. The paste should darken slightly in color and develop a more complex, roasted aroma before the next ingredient is added.
Step 4: Deglaze with Wine and Build the Braising Liquid
Increase the heat to medium-high and pour in the red wine. Using a wooden spoon or silicone spatula, scrape the bottom of the pot vigorously to dissolve all the fond — every caramelized bit that releases into the liquid represents concentrated flavor. Allow the wine to boil and reduce by roughly half, approximately 4–5 minutes, which cooks off the raw alcohol while concentrating the flavor compounds.
Add the beef stock, crushed tomatoes, Worcestershire sauce, smoked paprika, and dried oregano. Stir to combine, then nestle the seared beef pieces back into the pot, ensuring they are at least three-quarters submerged in the braising liquid. Tuck the rosemary, thyme, and bay leaves among the meat and vegetables. The liquid should come up to just below the top surface of the beef — it should not fully cover the meat, as the exposed top will slowly steam and baste itself.
Step 5: Braise in the Oven
Cover the Dutch oven with a tight-fitting lid and transfer to the preheated 325°F (160°C) oven. Braise for 2.5–3 hours, checking once at the halfway mark to ensure the liquid is maintaining a gentle, low simmer — small bubbles breaking the surface slowly rather than a rolling boil. If it appears to be boiling vigorously, reduce the oven temperature by 15–20°F (8–10°C).
The beef is ready when it is completely fork-tender — a fork inserted into the thickest piece should meet almost no resistance and twist out effortlessly. The meat should be on the verge of falling apart but still holding its shape as a cohesive piece. If it still offers resistance, cover and return to the oven for another 20–30 minutes.
Key tip: The difference between underbraised and perfectly braised beef is dramatic. Underbraised beef is tough and chewy despite long cooking — the collagen has not yet fully converted to gelatin. Be patient. Another 20–30 minutes in the oven when you are unsure is always the correct decision.
Step 6: Make the Homemade Mashed Potatoes
During the final 45 minutes of braising, prepare the mashed potatoes. Peel the Yukon Gold potatoes and cut into even 4–5cm (1½–2 inch) chunks. Place in a large pot of cold, generously salted water — the water should taste pleasantly salty, like a light broth. Bring to a boil over high heat, then reduce to a steady medium boil and cook for 18–22 minutes until a fork slides through the largest piece with absolutely no resistance.
Drain the potatoes thoroughly in a colander and return them to the hot, empty pot over low heat for 2–3 minutes, shaking occasionally — this drives off excess surface moisture and produces a drier, fluffier potato that absorbs more butter and cream. Pass the potatoes through a ricer or fine-mesh food mill directly back into the pot — this is the most effective way to achieve a perfectly smooth, lump-free mash. If you do not have a ricer, mash vigorously with a hand masher immediately after draining while the potatoes are still as hot as possible.
Add the room temperature butter in three additions, folding it in gently between each addition using a wooden spoon or rubber spatula — never a mixer, which overworks the starch and produces a gluey, gummy texture. Once all the butter is incorporated, stream in the warmed cream gradually, folding until the mash reaches your desired consistency. Season with salt and white pepper, taste, and adjust. If using sour cream, fold it in last. Keep warm over the lowest heat setting, covered, until the beef is ready.
Key tip: Warm cream and room temperature butter — never cold — are the keys to perfectly emulsified, silky mashed potatoes. Cold dairy lowers the temperature of the potatoes too quickly and prevents the starch granules from properly absorbing the fat, resulting in a mash that is stiff and slightly grainy rather than smooth and cloud-like.
Step 7: Finish the Sauce
Remove the Dutch oven from the oven and carefully transfer the beef pieces to a clean plate, covering loosely with foil to rest. Remove and discard the rosemary, thyme sprigs, and bay leaves. Place the pot over medium heat on the stovetop. Using a ladle or large spoon, skim any visible fat from the surface of the braising liquid.
Taste the sauce — it should already be deeply flavorful, rich, and complex. If it appears thin, increase the heat to medium-high and reduce it for 8–12 minutes, stirring occasionally, until it reaches a glossy, coating consistency. Once the sauce is at your desired consistency, remove from heat and swirl in the cold, cubed butter one piece at a time — a technique called monter au beurre — which emulsifies the butter into the sauce, giving it a silky sheen and a rounded, luxurious finish. Taste once more and adjust the seasoning. Return the beef pieces to the sauce.
Step 8: Plate and Serve
Spoon a generous mound of mashed potatoes into the center of each wide, shallow bowl or plate. Place 2–3 pieces of the braised beef on and alongside the mash. Ladle the glossy sauce generously over the beef and allow it to pool around the mashed potatoes. Scatter the fresh parsley over the top. Serve immediately with crusty bread alongside for sauce-mopping purposes — this is not optional, it is essential.
Nutritional Information
Per serving — based on 6 servings including mashed potatoes with full sauce. Values are approximate.
| Nutrient | Per Serving | % Daily Value* |
|---|---|---|
| Calories | 720 kcal | 36% |
| Total Fat | 38g | 49% |
| Saturated Fat | 17g | 85% |
| Total Carbohydrates | 42g | 15% |
| Total Sugar | 8g | — |
| Protein | 52g | 104% |
| Dietary Fiber | 5g | 18% |
| Sodium | 820mg | 36% |
| Potassium | 1,240mg | 26% |
| Iron | 35% DV | 35% |
| Zinc | 45% DV | 45% |
| Vitamin B12 | 55% DV | 55% |
| Vitamin C | 22% DV | 22% |
*Based on a standard 2,000-calorie daily diet. Values vary based on beef cut, exact quantities of butter and cream used, and serving portions.
At 52 grams of complete protein per serving, this dish exceeds the full daily protein requirement for many adults in a single meal. The iron content — 35% of the daily recommended value — is particularly significant for those monitoring iron intake, as heme iron from beef is absorbed at a rate 2–3 times higher than the non-heme iron found in plant sources.
Healthier Alternatives for the Recipe
Lower fat mashed potatoes: Replace the heavy cream with warm low-fat milk or unsweetened oat milk and reduce the butter by half, compensating with 3 tablespoons of full-fat Greek yogurt for creaminess and tang. This modification reduces the fat content of the mashed potato component by approximately 45% without significantly compromising texture.
Lower calorie braise: Use beef round or lean brisket in place of chuck — these cuts are considerably leaner and still braise well, though they require slightly more careful monitoring as they have less intramuscular fat to protect against drying. Skim the braising liquid aggressively before finishing the sauce.
Dairy-free: Replace the butter in the mashed potatoes with high-quality plant-based butter and substitute warm, full-fat oat milk or cashew milk for the cream. Omit the finishing butter in the sauce and replace it with 1 tablespoon of good-quality extra virgin olive oil swirled in off the heat.
Lower sodium: Use homemade or certified low-sodium beef stock, replace Worcestershire sauce with a small splash of balsamic vinegar and a dash of fish sauce, and reduce the added salt throughout by one-third. These substitutions can reduce the sodium per serving by 25–30% while preserving the depth of flavor the recipe depends on.
Root vegetable alternative to mashed potatoes: Substitute the Yukon Gold potatoes with an equal quantity of celeriac (celery root), cauliflower, or parsnips — or a combination of all three. Each produces a beautifully smooth purée with a distinct flavor character that complements the braised beef with a different but equally satisfying result.
Wine-free braise: Replace the red wine entirely with an equal quantity of additional beef stock combined with 1 tablespoon of balsamic vinegar, 1 tablespoon of pomegranate juice or red grape juice, and an extra teaspoon of tomato paste. This combination replicates the acidity, sweetness, and depth that the wine contributes without any alcohol content.
Serving Suggestions
Classic Sunday dinner presentation: Serve in wide, shallow bowls with the mashed potatoes in the center, beef pieces arranged around or on top, sauce ladled generously over everything, and a glass of the same red wine used in the braise alongside. A simple green salad with a sharp vinaigrette dresses the table without competing with the main event.
Dinner party centerpiece: Transfer the braised beef and sauce to a large, wide serving dish and present the mashed potatoes in a separate bowl alongside. Set both in the center of the table for guests to serve themselves family-style — this format is deeply convivial, visually impressive, and significantly reduces plating stress when cooking for a group.
Over pasta or polenta: Serve the braised beef and its sauce spooned generously over a bowl of soft, freshly made polenta or a wide pasta such as pappardelle, tagliatelle, or rigatoni instead of mashed potatoes. The sauce clings beautifully to all of these alternatives and the combination has a distinctly Italian regional character that feels appropriately celebratory.
Open sandwich — beef brisket style: Shred any leftover beef and pile generously onto thick slices of toasted sourdough. Spoon the sauce over the top, add a smear of horseradish cream, pickled red onion, and a scattering of microgreens. This transforms leftovers into a lunch that requires absolutely no apology.
With crusty bread and a simple side salad: For a more casual, bistro-style presentation, serve a single large piece of beef swimming in sauce in a shallow bowl alongside a thick slice of crusty sourdough or a warm baguette, with a simple watercress, endive, and walnut salad on the side. This is the French countryside approach — unpretentious, direct, and deeply satisfying.
Topped with gremolata: Just before serving, scatter a simple gremolata — a mixture of finely chopped lemon zest, raw garlic, and fresh parsley — over the plated dish. This Italian garnish, traditional with osso buco, cuts brilliantly through the richness of the braise and adds a vibrant freshness that transforms the flavors of the entire plate.
Common Mistakes to Avoid
Not patting the beef dry before searing. Surface moisture creates steam in the pan, which prevents the Maillard reaction from occurring and produces grey, pale, steamed meat rather than a deep mahogany sear. The sear is not merely aesthetic — it creates hundreds of new flavor compounds that dissolve into the braising liquid and form the backbone of the sauce. This step is foundational.
Searing in an overcrowded pot. Adding too many pieces of beef to the pot simultaneously drops the pan temperature dramatically, causing the meat to steam in its own released moisture rather than sear. Work in small batches of 3–4 pieces maximum, regardless of how much time it adds. Each batch takes 6–8 minutes — the investment pays for itself exponentially in the final flavor of the dish.
Skipping the caramelization of the tomato paste. Tomato paste added directly to liquid without being cooked first has a raw, slightly acidic, metallic flavor that can persist through the entire braise. Cooking it in the fat with the aromatics for 2–3 minutes caramelizes its natural sugars, removes the raw flavor, and transforms it into a deeply savory, jammy paste that enriches the sauce in a way that raw paste cannot.
Braising at too high a temperature. A braise cooked at too high a temperature boils rather than gently simmers, which tightens and toughens the muscle fibers rather than slowly dissolving them. The liquid should be barely simmering — small, lazy bubbles breaking the surface at irregular intervals. If you can hear aggressive bubbling inside the oven, the temperature needs to come down.
Using a food processor or electric mixer for the mashed potatoes. Over-processing potatoes ruptures the starch granules and releases excessive amylose, which cross-links and creates a dense, gluey, paste-like texture that cannot be reversed. A potato ricer, food mill, or hand masher is the only appropriate tool for mashed potatoes that are light, fluffy, and cloud-like.
Not resting the beef before plating. Resting the beef loosely covered for 10 minutes after removing it from the braising liquid allows the internal temperature to equalize and the muscle fibers to relax, releasing juices back into the meat rather than onto the plate. Beef that is cut or plated immediately loses significantly more juice and arrives on the plate slightly drier than properly rested beef.
Storing Tips for the Recipe
Refrigerator: This is one of the finest leftover dishes in the entire canon of home cooking. Store the braised beef in its sauce in an airtight container in the refrigerator for up to 4 days. The flavor deepens substantially overnight as the sauce fully penetrates the meat — many experienced cooks deliberately make this dish a day ahead of serving for exactly this reason. Store the mashed potatoes separately in an airtight container for up to 3 days.
Reheating the beef: Reheat the beef and sauce gently in a covered saucepan over low heat with a splash of additional beef stock if the sauce has thickened significantly overnight. Do not rush reheating — gentle, low heat preserves the texture of the meat far better than aggressive reheating, which can toughen the exterior. The oven at 300°F (150°C), covered, for 20–25 minutes is the most reliable and gentle reheating method for the braised beef.
Reheating the mashed potatoes: Reheat in a saucepan over low heat with a splash of warm milk or cream, stirring constantly. Add a small knob of fresh butter and stir vigorously as the potatoes warm through — this revives the emulsification and restores the silky texture. Alternatively, reheat in the microwave at 50% power in 60-second intervals, stirring between each, adding a splash of warm cream if needed.
Freezer: Braised beef freezes exceptionally well — it is one of the most freezer-friendly dishes in home cooking. Allow the beef and sauce to cool completely, then transfer to freezer-safe containers and freeze for up to 3 months. Thaw overnight in the refrigerator before reheating. Mashed potatoes do not freeze particularly well as they become watery and grainy upon thawing — make these fresh on the day of reheating.
Meal prep and advance cooking: The entire braised beef component, including the finished sauce, can be made 1–2 days ahead and refrigerated. This is not just acceptable — it is actively recommended. The cold fat that rises and solidifies on the surface of the refrigerated braise can be lifted off cleanly with a spoon, resulting in a leaner, more refined sauce than one served immediately after cooking.
Conclusion
Braised beef in sauce with homemade mashed potatoes is the definitive answer to the question of what comfort food at its most accomplished looks and tastes like. Slow-cooked beef that melts at the touch of a spoon, a deeply glossy sauce built from hours of patient flavor development, and silky, buttery mashed potatoes that serve as the perfect canvas — this is a meal that earns every minute it asks of you and repays it many times over on the plate.
Ready to braise? Make this recipe for your next Sunday dinner, a dinner party, or any evening that deserves something truly special. Share your results in the comments below — tell us which cut of beef you used, what wine you cooked with, and how the table reacted when you served it. Leave a review, share this guide with someone who deserves a great meal, and subscribe to our newsletter for more deeply satisfying, technique-driven recipes delivered to your inbox every week. Your Dutch oven is about to earn its place as your most treasured piece of kitchen equipment.
FAQs
What is the best cut of beef for braising? Beef chuck roast is the undisputed champion of braising cuts — its high collagen content converts to rich, silky gelatin over long cooking, which both tenderizes the meat and thickens the sauce naturally. Beef short ribs are the premium alternative, producing a richer, more unctuous result with exceptional flavor. Brisket braises beautifully but benefits from being sliced rather than chunked. Oxtail is the most gelatin-rich option of all and produces an extraordinary sauce, but requires a longer braise of 3.5–4 hours. Avoid lean cuts such as sirloin or tenderloin — they lack the necessary fat and collagen to respond well to long, moist braising.
Can I make this recipe in a slow cooker? Yes, with one non-negotiable step: sear the beef and build the aromatic base on the stovetop exactly as the recipe directs before transferring everything to the slow cooker. Skipping the sear produces a noticeably less flavorful dish. Cook on low for 8–10 hours or on high for 5–6 hours. Transfer the cooking liquid to a saucepan after cooking and reduce it on the stovetop to achieve the glossy sauce consistency, then finish with butter as directed.
Can I make this in an Instant Pot or pressure cooker? Absolutely. Sear the beef and build the aromatic base using the sauté function, deglaze with wine, add all braising liquid components, seal the lid, and pressure cook on high for 55–65 minutes with a 15-minute natural pressure release. The result is remarkably close to the oven-braised version in a fraction of the time, though the sauce will require more reduction after pressure cooking as the closed environment prevents evaporation.
Why is my braised beef tough after 2.5 hours? Braised beef goes through a temporary phase of toughness before the collagen fully converts to gelatin — typically between the 1.5 and 2-hour marks. If the beef is still tough at 2.5 hours, the braise temperature may be too low, or the specific cut requires more time. Cover the pot and return it to the oven for another 30–45 minutes. The transformation from tough to meltingly tender can happen within a relatively short additional window — patience is always the correct response.
What red wine should I use for braising? Use a dry, full-bodied red wine that you would enjoy drinking — Cabernet Sauvignon, Côtes du Rhône, Chianti, or Merlot all work beautifully. The general rule in braising is to never cook with a wine you would not drink, as poor-quality wines with off-flavors concentrate during the long braise and can make the finished sauce taste harsh or unpleasant. You do not need an expensive bottle — a reliable mid-range wine in the $12–$18 range produces an excellent result.
How do I prevent lumpy mashed potatoes? The three main causes of lumpy mashed potatoes are under-cooked potatoes, over-worked potatoes, and cold dairy. Ensure the potatoes are fully cooked until a fork slides through with zero resistance before draining. Pass them through a ricer or food mill rather than mashing with a mixer. Add warm butter and heated cream rather than cold. Following all three of these principles consistently produces smooth, lump-free mashed potatoes every single time.