
Follow Me On Social Media!
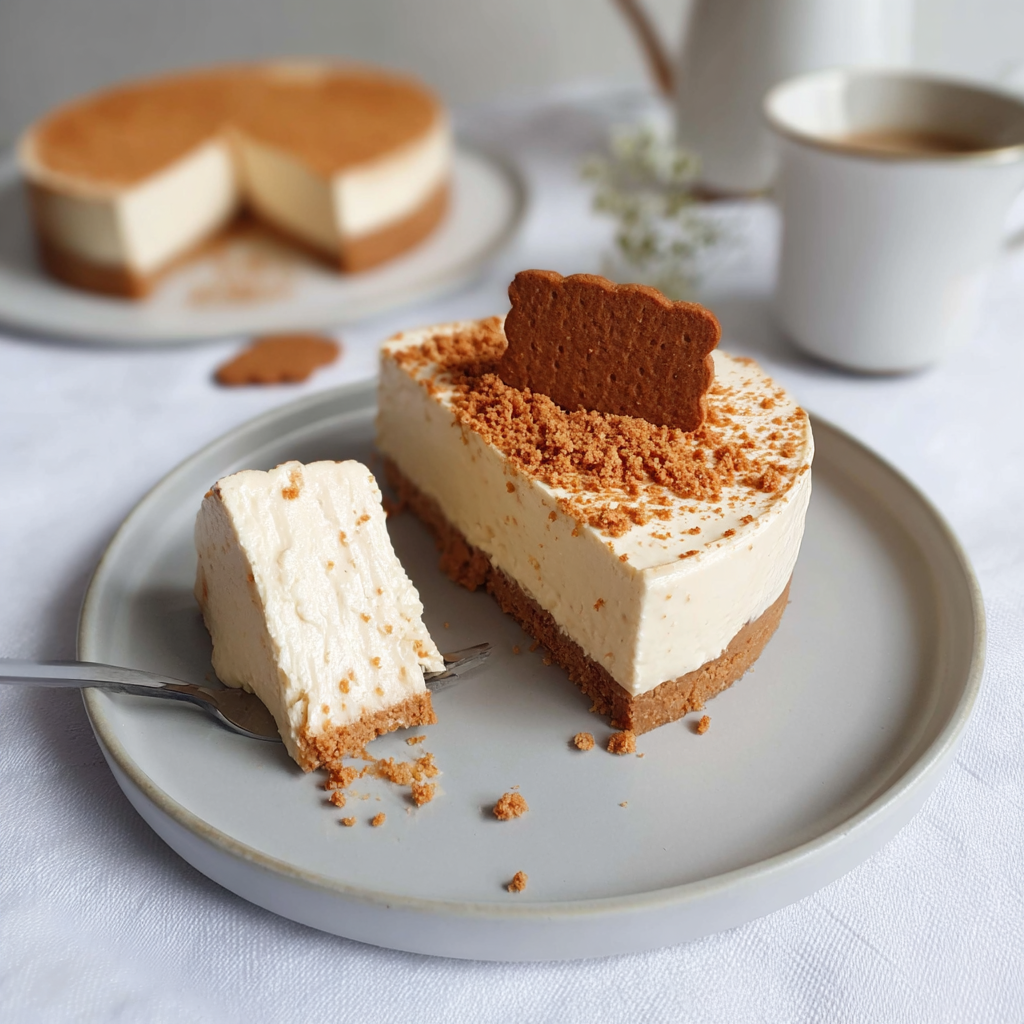
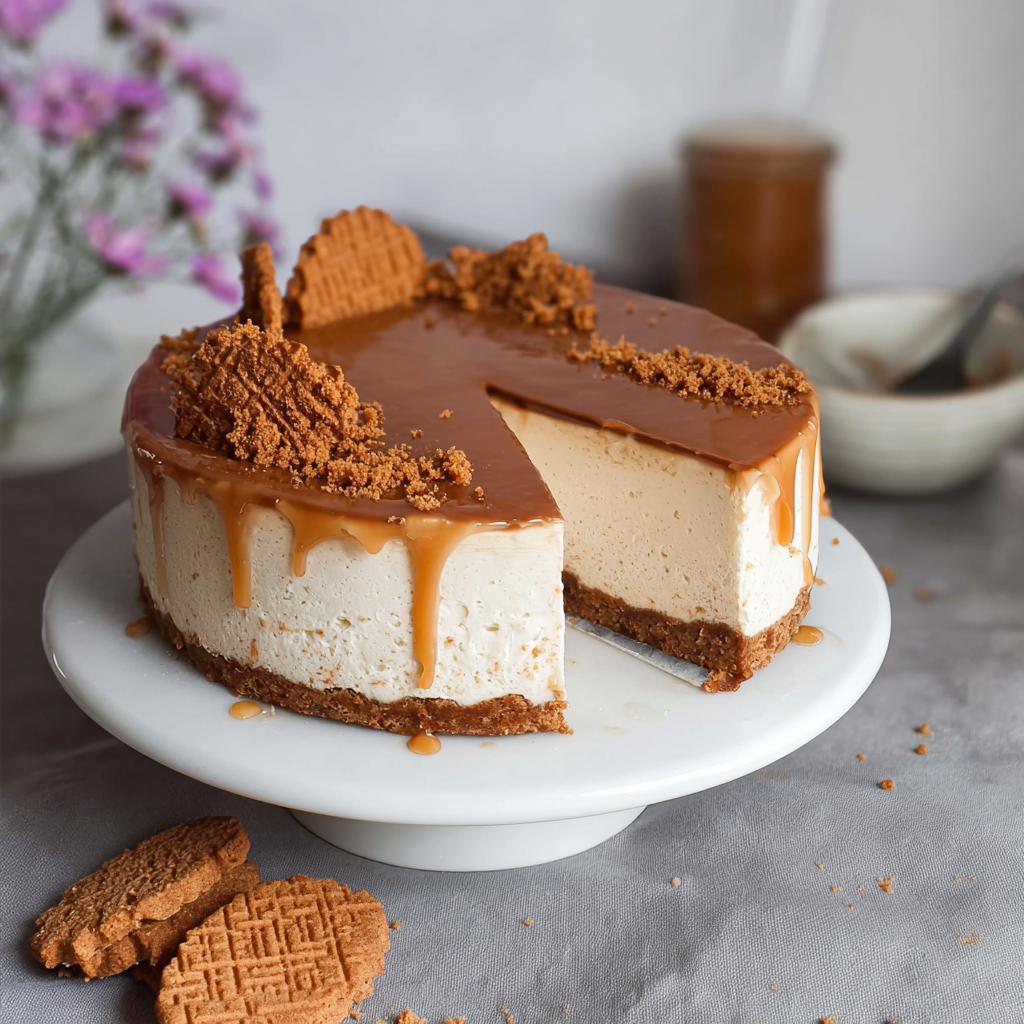
No-Bake Biscoff Cheesecake
Introduction
Here is a question that challenges the assumption that impressive desserts require impressive effort: when was the last time a cheesecake — a dessert category with a justified reputation for technical difficulty, cracking anxiety, and extended oven time — arrived at a dinner table looking and tasting like something from a professional patisserie window, despite requiring no oven, no water bath, no eggs, and under 25 minutes of active preparation?
According to a 2024 global dessert trend report by the Specialty Food Association, Biscoff — the caramelized, spiced Belgian cookie butter made from Lotus biscuits — has become the fastest-growing flavoring ingredient in home dessert making globally, driven by its extraordinary versatility, its unique warm spice profile combining cinnamon, ginger, nutmeg, and caramelized sugar, and its ability to transform any cream-based dessert into something that tastes simultaneously familiar and completely distinctive. This no-bake Biscoff cheesecake uses that ingredient at every layer — in the crust, swirled through the filling, and drizzled over the top — to produce a cheesecake of extraordinary depth and visual drama that has become one of the most requested no-bake desserts in contemporary home baking.
The technique is the same as all great no-bake cheesecakes — cream cheese whipped with icing sugar and vanilla, folded with whipped cream to produce a stable, mousse-like filling that sets firmly in the refrigerator without any cooking — but the Biscoff elements at every level of the dessert create a flavor and visual experience that elevates the format to something genuinely special. The caramelized biscuit base, the creamy Biscoff-swirled filling, and the glossy lotus biscuit topping produce a cross-section when sliced that is visually extraordinary and a flavor profile that generates more immediate recipe requests than almost any other dessert in this collection.
A 2023 food culture analysis by Bon Appétit identified cookie butter-based desserts as the single most viral home baking category on social media platforms globally — driven by the combination of the visually striking caramel color, the universally appealing warm spice flavor, and the ease of execution that makes the results accessible to any home baker regardless of skill level.
Ingredients List
For the Biscoff Crust
- 300g (10.5 oz) Lotus Biscoff biscuits (approximately 24 biscuits)
- 80g (⅓ cup) unsalted butter, melted
- 2 tbsp Biscoff spread (smooth — stirred into the crust for maximum flavor)
- Pinch of fine sea salt
For the Biscoff Cheesecake Filling
- 600g (21 oz) full-fat cream cheese, softened to room temperature (two standard blocks — do not use low-fat)
- 200g (1½ cups) powdered sugar, sifted
- 1 tsp pure vanilla extract
- 200g (¾ cup) Biscoff spread, smooth (at room temperature — slightly warm for best incorporation)
- 300ml (1¼ cups) heavy whipping cream, very cold
- 1 tsp fresh lemon juice (brightens and balances the richness)
For the Biscoff Topping
- 150g (½ cup + 2 tbsp) Biscoff spread, for drizzling (warmed to drizzleable consistency)
- 8–10 whole Lotus Biscoff biscuits, for decoration
- 50ml (3 tbsp) heavy cream (mixed with warmed Biscoff spread for a ganache-style topping)
Optional Finishing Touches
- Crushed Biscoff biscuits, scattered over the surface
- Gold or bronze luster dust (for a glamorous finish)
- Flaky sea salt (the sweet-salty contrast is remarkable)
Timing
- Prep Time: 25 minutes
- Setting Time: 6 hours minimum (overnight is strongly preferred)
- Total Time: 25 minutes active, overnight with setting
The overnight setting period is where the cheesecake transforms from a soft, mousse-like filling into a firm, cleanly sliceable dessert with a defined structure. A cheesecake set for only 4 hours will be soft — one set overnight will slice with clean, defined layers that show every component distinctly. Make it the night before any occasion.
Step-by-Step Instructions
Step 1: Make the Biscoff Crust
Place the Biscoff biscuits in a food processor and pulse until fine, uniform crumbs form — approximately 10–12 pulses. Alternatively, place in a sealed zip-lock bag and crush with a rolling pin until no pieces larger than 3mm remain. Transfer to a bowl and add the melted butter, Biscoff spread, and salt. Mix until every crumb is evenly coated and the mixture clumps when pressed between your fingers — it should hold together firmly without crumbling apart or appearing wet.
Press the crust mixture into the base of a 23cm (9-inch) springform pan using the flat bottom of a glass or a straight-sided measuring cup — pressing firmly and evenly to produce a uniform depth of approximately 8mm across the entire base. For a particularly neat edge, use a spoon to press the crumbs slightly up the sides of the pan by approximately 1cm — this raised edge prevents the filling from flowing under the crust when sliced.
Refrigerate for 20 minutes to firm the crust before adding the filling — a cold, firm crust is more resistant to movement when the filling is poured over it and produces cleaner layer definition in the finished cheesecake.
Key tip: The addition of Biscoff spread to the crust mixture — alongside the butter — intensifies the caramelized spice flavor of the base and produces a crust that tastes distinctly of Biscoff rather than merely of crushed biscuit. This layering of the flavor through every component is what makes this cheesecake so distinctive.
Step 2: Make the Cheesecake Filling
Beat the softened cream cheese in a large bowl with a hand or stand mixer on medium speed for 2 minutes until completely smooth with no lumps — cold or insufficiently beaten cream cheese produces a lumpy filling that cannot be corrected after the other ingredients are incorporated. Add the sifted powdered sugar, vanilla extract, and lemon juice and beat for another 2 minutes until light and fluffy. Add the room-temperature Biscoff spread and beat for 60 seconds until completely incorporated and the mixture is a uniform caramel-tan color throughout.
Key tip: The Biscoff spread must be at room temperature — not cold from the refrigerator, which would cause it to seize and create uneven streaks rather than incorporating smoothly, and not warm enough to melt, which would affect the final set consistency. Room temperature spread blends in under 60 seconds and produces the uniform caramel flavor throughout the filling.
Step 3: Whip the Cream
In a separate clean, cold bowl, whip the very cold heavy cream on high speed until it holds firm peaks — peaks that stand straight when the beater is lifted without drooping or curling over at the tip. The cream must be cold to whip to the correct stiffness — warm cream will not whip to firm peaks regardless of beating time. Firm peaks rather than soft peaks are necessary here — the stiff whipped cream provides the structural support that allows the cheesecake to set firmly without gelatin.
Key tip: Chill the bowl and beaters in the freezer for 5 minutes before whipping — this ensures the cream stays cold throughout the whipping process and reaches firm peaks more quickly and reliably.
Step 4: Fold the Cream Into the Filling
Add one-third of the whipped cream to the Biscoff cream cheese mixture and stir firmly — this first addition lightens the dense cream cheese base sufficiently to accept the remaining cream without deflating it. Fold the remaining cream in two additions using a large rubber spatula with slow, sweeping strokes — cutting down through the center, sweeping along the bottom, and folding up and over. Stop the moment the cream is no longer visible as white streaks. The finished filling should be light, airy, and mousse-like in texture — not stiff or dense.
Step 5: Fill and Swirl
Remove the chilled crust from the refrigerator. Pour the Biscoff cheesecake filling over the crust and spread evenly with an offset spatula or the back of a large spoon, smoothing the surface to be as flat as possible — a perfectly flat surface is the canvas for the dramatic Biscoff topping.
For an optional swirl effect within the filling: warm 3 tablespoons of additional Biscoff spread until pourable, drop spoonfuls randomly across the surface of the filling, and use a skewer or toothpick to create swirls by dragging it through the Biscoff in a figure-of-eight pattern. This creates the marbled, swirled interior that is revealed when the cheesecake is sliced.
Step 6: Set Overnight
Cover the springform pan loosely with plastic wrap — without the plastic touching the surface of the cheesecake — and refrigerate for a minimum of 6 hours, overnight strongly preferred. The filling sets gradually as the cream’s fat crystals firm and the protein networks in the cream cheese stabilize — a process that cannot be accelerated and should not be interrupted.
Step 7: Apply the Topping and Serve
Remove the cheesecake from the refrigerator 15 minutes before serving. Warm the Biscoff spread for the topping in a microwave-safe bowl in 10-second intervals, stirring between each, until pourable but not hot. If making the ganache-style topping, stir the warm Biscoff spread with the heavy cream until smooth and glossy. Pour slowly over the center of the cheesecake and gently tilt the pan to allow it to spread to the edges in an even, glossy layer.
Arrange the whole Biscoff biscuits decoratively around the perimeter of the topping, scatter crushed biscuits across the center, and finish with a pinch of flaky sea salt if desired. Release the springform ring carefully and transfer to a serving plate. Slice with a long, thin knife dipped in hot water and wiped clean between each cut.
Nutritional Information
Per serving — based on 12 slices.
| Nutrient | Per Serving | % Daily Value* |
|---|---|---|
| Calories | 520 kcal | 26% |
| Total Fat | 36g | 46% |
| Saturated Fat | 20g | 100% |
| Total Carbohydrates | 46g | 17% |
| Total Sugar | 32g | — |
| Protein | 6g | 12% |
| Dietary Fiber | 0.5g | 2% |
| Sodium | 220mg | 10% |
| Calcium | 8% DV | 8% |
| Vitamin A | 18% DV | 18% |
*Based on a standard 2,000-calorie daily diet.
This is an indulgent dessert by any nutritional measure — the combination of cream cheese, heavy cream, and Biscoff spread produces a high fat, high sugar profile that is entirely appropriate for a celebration dessert consumed in modest portions. The Vitamin A content — 18% of the daily recommended value from the cream cheese and cream — is a modest but genuine micronutrient contribution.
Healthier Alternatives
Lower fat filling: Replace 300g of the cream cheese with an equal weight of full-fat Greek yogurt drained through a cheesecloth for 2 hours to remove excess liquid. The filling will be tangier and less rich but remains entirely pleasant, with the saturated fat content reduced by approximately 30%.
Lower sugar: Reduce the powdered sugar to 130g — the Biscoff spread provides significant inherent sweetness that supports a meaningful sugar reduction without the filling tasting undersweetened.
Lighter crust: Reduce the butter in the crust to 60g and replace the Biscoff spread addition with an extra tablespoon of melted butter. The crust will be slightly less rich but fully cohesive.
Individual portions: Make in individual glasses or ramekins for built-in portion control — each portion contains approximately 40% less filling than a full slice and the format makes smaller serving sizes feel intentional rather than reduced.
Serving Suggestions
Classic dinner party dessert: Served at the table in the springform pan with the ring released and the Biscoff topping gleaming — sliced at the table with a hot knife for the cleanest cross-sections. This is the format that generates the most immediate visual admiration.
With salted caramel drizzle: Drizzle a tablespoon of warmed salted caramel sauce over each slice at serving — the additional caramel depth amplifies the Biscoff’s caramelized character and the salt cuts through the richness with precision.
Mini cheesecakes: Press the crust into a 12-cup muffin tin lined with paper liners. Fill and set overnight. Individual cheesecakes topped with a single Biscoff biscuit are one of the most charming and practical party dessert formats available.
As a frozen cheesecake: Freeze the set cheesecake for 2 hours until partially frozen and serve in thin slices — the semi-frozen texture produces a dense, ice-cream-like eating experience that is particularly appealing in warm weather.
With fresh fruit: Sliced strawberries or raspberries alongside each portion provide a sharp, fruity acidity that cuts through the richness of the cream cheese and Biscoff with remarkable effectiveness — the bright red fruit against the caramel cheesecake is also visually striking.
Common Mistakes to Avoid
Using cold cream cheese. Cold cream cheese produces a lumpy filling that no amount of beating corrects after the other ingredients are added. The cream cheese must be genuinely room temperature — at least 1 hour out of the refrigerator — before beating begins.
Not whipping the cream to firm peaks. Soft-peaked cream does not provide sufficient structural support for the filling to set firmly — the cheesecake will be soft, difficult to slice cleanly, and will not hold defined layers when cut. Firm, stiff peaks are the target.
Using cold Biscoff spread. Cold Biscoff spread from the refrigerator is too stiff to incorporate smoothly and creates uneven streaks rather than the uniform caramel flavor throughout the filling. Room temperature spread blends in under 60 seconds.
Insufficient setting time. Six hours produces a soft cheesecake; overnight produces a firm, cleanly sliceable one. The difference in sliceability between a 6-hour and a 12-hour set cheesecake is dramatic — plan accordingly and make it the day before serving.
Applying a hot Biscoff topping. Biscoff spread that is too hot — above approximately 95°F (35°C) — will melt the surface of the set cheesecake and create a mixed, murky layer rather than the distinct glossy topping. Warm to pourable but not hot — 10-second microwave intervals with testing between each.
Storing Tips
Refrigerator: Cover loosely and refrigerate for up to 5 days. The flavor deepens over the first 24–48 hours as the Biscoff permeates through the filling — the best version of this cheesecake is served 24 hours after making.
Serving from cold: Remove from the refrigerator 15 minutes before slicing — the filling softens slightly from its coldest state to the ideal creamy, yielding consistency.
Freezer: Freeze without the Biscoff topping for up to 2 months. Wrap tightly in plastic and then foil. Thaw overnight in the refrigerator and apply the topping fresh before serving.
Individual slices: Store individual slices between sheets of parchment in an airtight container for up to 3 days — the most practical approach for households where the full cheesecake will not be consumed at a single sitting.
Conclusion
No-bake Biscoff cheesecake proves that the most visually impressive, most flavor-forward, most immediately admired dessert in any home entertainer’s repertoire requires no oven, no eggs, no water bath, and under 25 minutes of active preparation. Biscoff at every layer — crust, filling, and topping — produces a depth and cohesion of flavor that makes every bite unmistakably, extraordinarily itself. Make it the night before, release the ring at the table, and accept the compliments.
Make it and share your results in the comments — tell us whether you made the swirl interior, which topping format you chose, and whether it survived until dessert without disappearing first. Leave a review, share with someone who loves Biscoff, and subscribe to our newsletter for more no-bake, show-stopping dessert recipes every week.
FAQs
Can I use gelatine to make the cheesecake set more firmly? The whipped cream folded into the cream cheese provides sufficient structural support for a firm set without gelatine — provided the cream reaches firm peaks and the cheesecake sets for the full overnight period. If a particularly firm, sliceable set is needed — for warmer environments or longer transport — dissolve 2 teaspoons of powdered gelatine in 3 tablespoons of warm water, allow to cool slightly, and fold into the filling before the whipped cream.
What can I substitute for Biscoff spread? Any cookie butter made from spiced, caramelized biscuits produces comparable results — Trader Joe’s Speculoos Cookie Butter is a widely available North American equivalent. Homemade Biscoff spread — made by blending Lotus biscuits with oil, sugar, and cinnamon — works excellently. Peanut butter or Nutella can replace the Biscoff spread for entirely different but equally compelling flavor variations, though neither replicates the specific warm spice character of Biscoff.
Why is my filling not setting firm? The three most common causes are cream that was not whipped to firm peaks, cream cheese that was too warm and over-beaten causing it to break down, or insufficient chilling time. Verify the cream reaches stiff peaks before folding, beat the cream cheese only until smooth rather than continuing until very fluffy, and allow the full overnight setting time. If the filling is still soft after 12 hours, it may have been under-whipped — serve from the pan rather than attempting to unmold.
Can I make this cheesecake in individual glasses? Absolutely — layer crushed Biscoff biscuit crumbs at the base of each glass, add the filling, and top with warmed Biscoff spread and a whole biscuit. Individual glasses eliminate the unmolding concern entirely and create an elegant, self-contained portion that requires no slicing skill. Set overnight in the glasses and serve directly in them.
How do I get perfectly clean slices? Dip a long, thin knife in a tall glass of very hot water and wipe completely dry between every single cut — the warm, dry blade melts through the cream cheese filling without dragging. A cold knife drags and tears the filling regardless of how sharp it is. The hot-wipe technique produces the clean, smooth cross-sections that showcase every layer of the cheesecake.
Is this cheesecake suitable for a large group? Scale directly — use a 28cm (11-inch) springform pan, increase all quantities by 50%, and extend the setting time to the full overnight regardless of the minimum 6-hour guidance. For a very large group, two standard 23cm cheesecakes made simultaneously are more practical than scaling to a single large pan, as the larger filling volume requires significantly longer setting time for the center to firm completely.